Web Interface Walk Through
Basics
Merge Launch is a graphical front-end to merge-based testbeds. It allows an experimenter to create, edit, and delete projects, experiments, realizations, and experiment models and interact generally with a testbed. It uses the MergeTB REST API to do this.
Note that Launch is a work-in-progress and may become unsynchronized occasionally. If it does, a refresh will generally resynchronize it.
Also note that the screenshots below were taken in a test environment and they show the site as not secure. The actual Launch site is only accessible via HTTPS and is secured with valid certifcates.
This page will demonstrate how to get started with Launch - from account creation through materialization a real experiment on testbed hardware. The basic steps are:
- Create and activate your account
- Create an experiment and push an experiment model
- Realize (reserve) resources and materialize (instantiate) the model
- Dematerialize and free realized resources
Account Creation and Authentication
There are three steps to having an active and usable account on the testbed.
- Create an account. The testbed uses the Merge OAuth2 system for creation and authentication of accounts.
- A testbed admin must activate the account. Until your account is activated by an admin, you will not be able to interact with the testbed.
- Upload an SSH formatted public key.
Account Creation
Start by opening a browser and navigating to https://launch.mergetb.net. Click the "login" link in the center panel or the login link in the upper right.
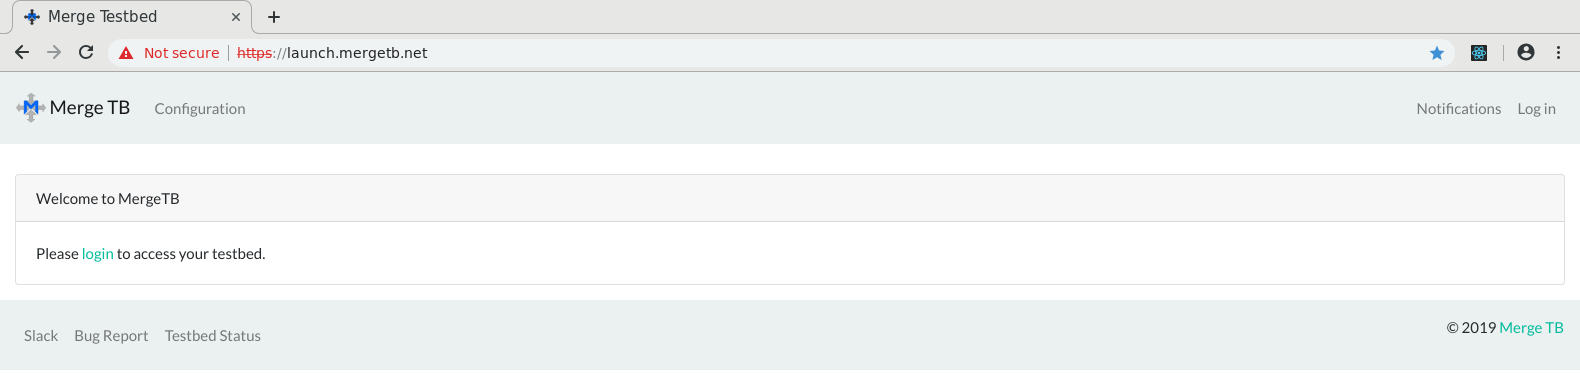
This will take you to the Merge OAuth login, where you can create an account. Click the "Sign Up" tab, give a valid email-address, the username you'd like, and a password. Then click the "Sign Up" button at the bottom. This creates your account.
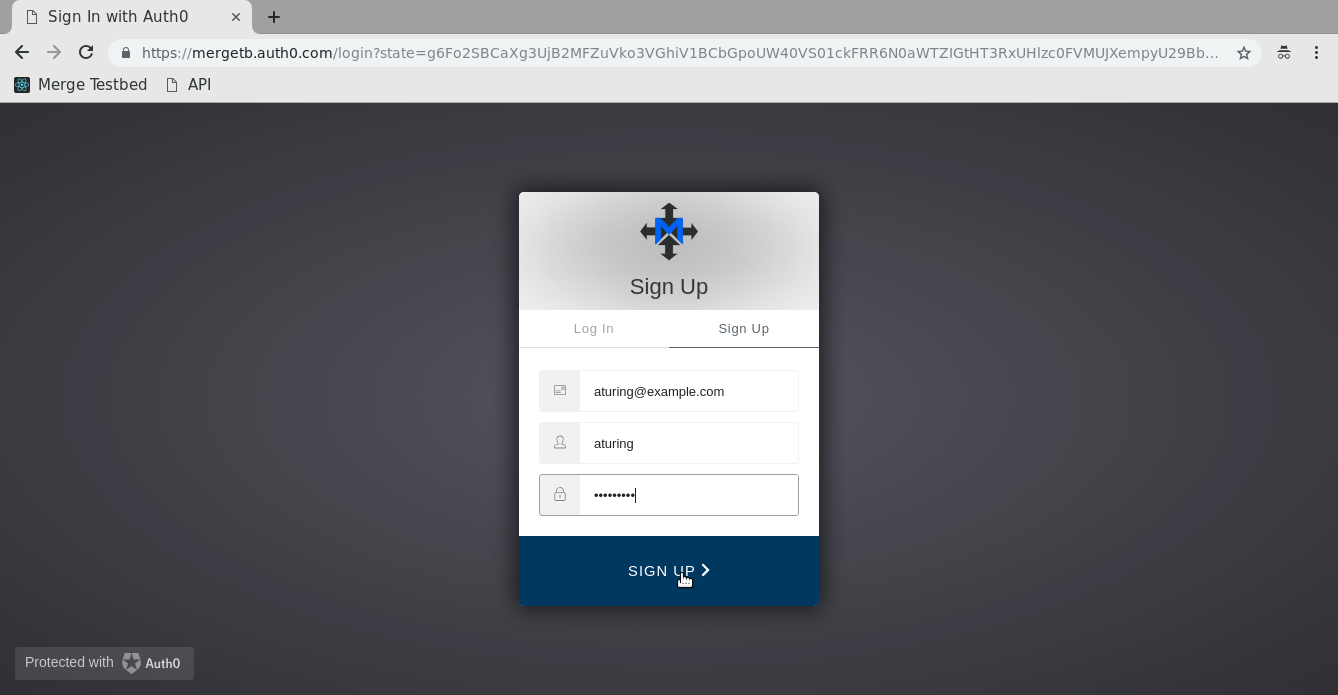
After you've created the account, Auth0.com will send you an email to verify your MergeTB account. Please verify the account.
Activating the Account
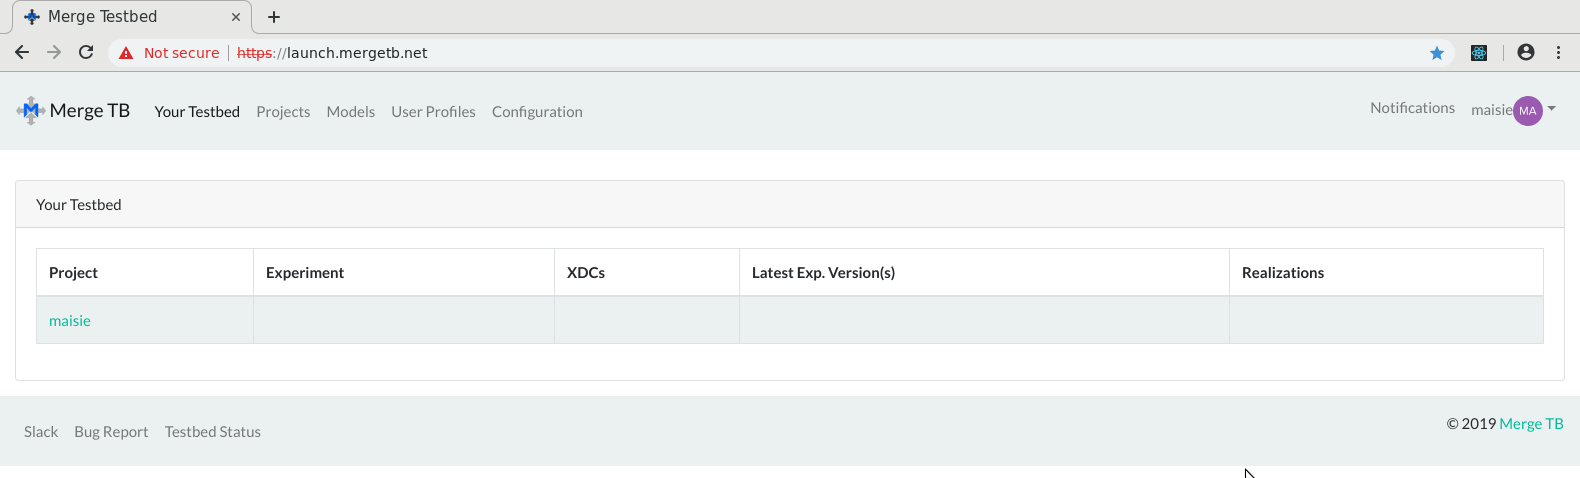
Once the account is created, you'll be redirected to the initial Launch page. Note that you do not have access to any data and all pages will be empty as seen below. You'll know your account has been activated by the testbed adminstrators when a project name which matches your userid is seen in the "Your Testbed" view. This is your "personal project".
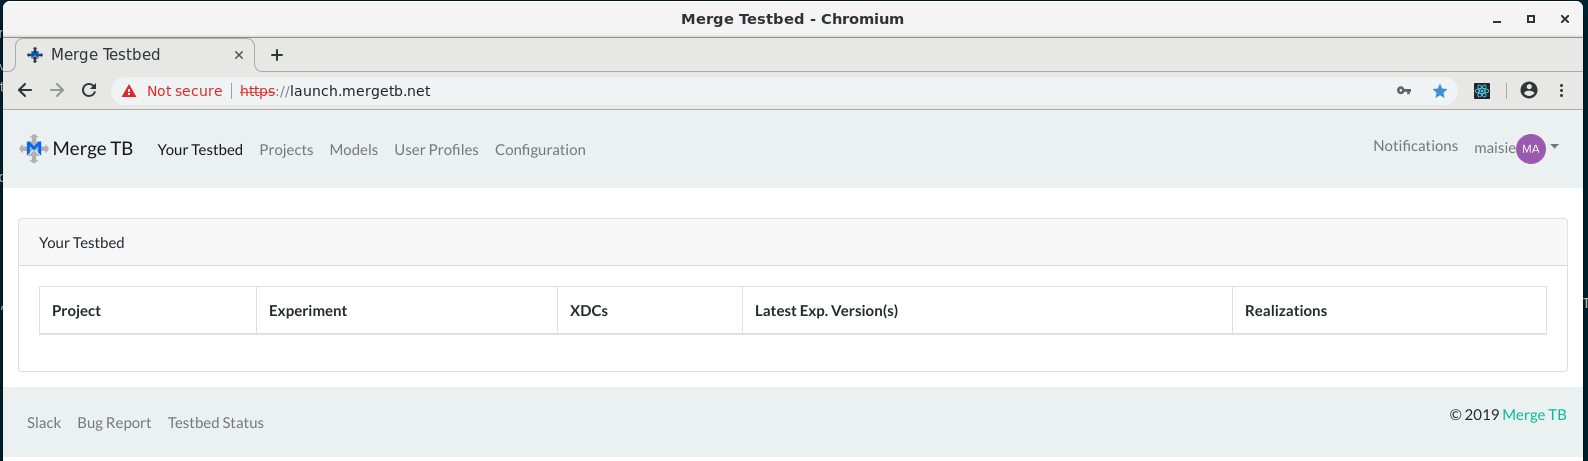
Click the Login link in the upper right and login, if you're not logged in already. If your account is not active (which yours is not at this point), Launch sends a message to the system telling it to initialize the account and create your personal project. This project will be your initial empty project.
The system does not automatically notify testbed operators (yet), so please login to the #general channel of the DComp Slack and request activation of your testbed account.
Add Your Public Key
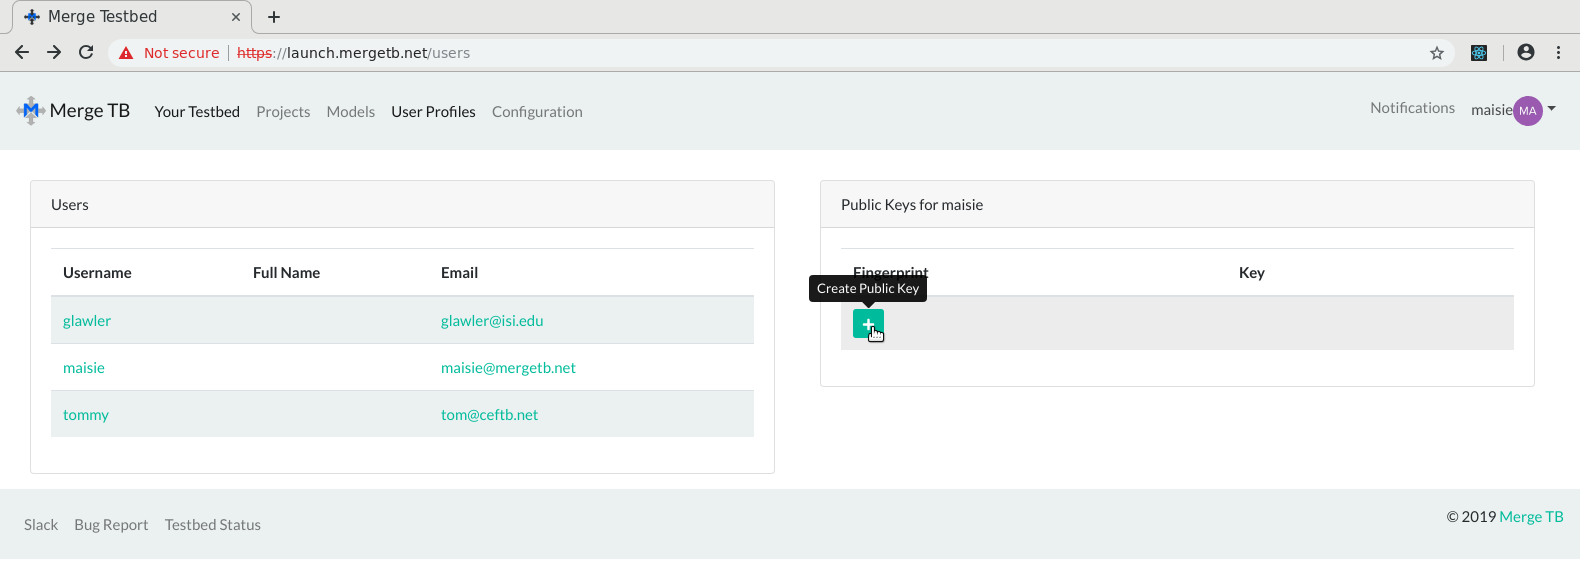
Once your account is activated, upload a public key to the portal. This key will be inserted into your Experiment Development Containers (XDCs) you create and your materialized experiment nodes. Click the User Profiles link in the header and click the + in the Public Keys widget.
NOTE: We only support SSH public key format keys at the moment. We do not support PKCS#1 PEM formatted keys. The key you upload must start with ssh-rsa ... and not -----BEGIN RSA PUBLIC KEY-----.
We recommend not using passphrase protected keys. (If you do use passphrase protected keys, you need to run exec ssh-agent bash and then ssh-add when using these keys in an active experiment.)
After Account Activation
Once your account is activated, you'll see your personal project.
Materialization Walk-through
To get an experiment materialized on the testbed, do the following:
- Create an experiment
- Load and push a model to your experiment
- Realize the model
- Accept the realization proffered
- Materialize the realization
Experiments are contained in projects. To create an experiment within a project, click the project in the "Your Testbed" view, then the "+" in the Experiments panel.
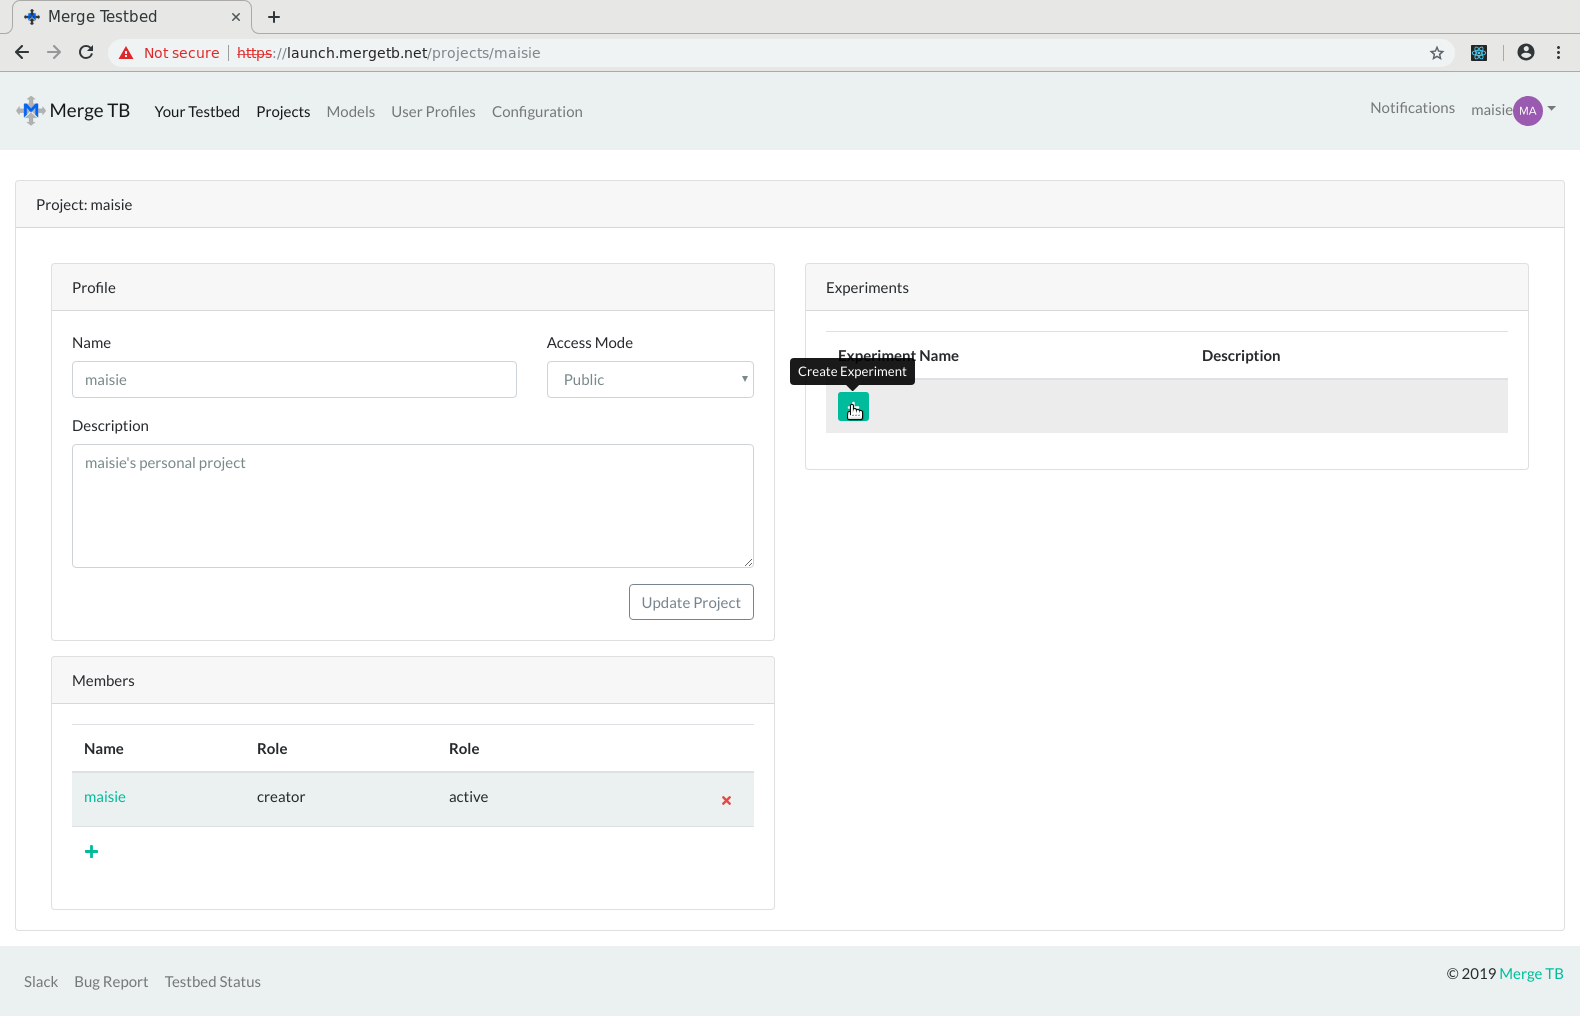
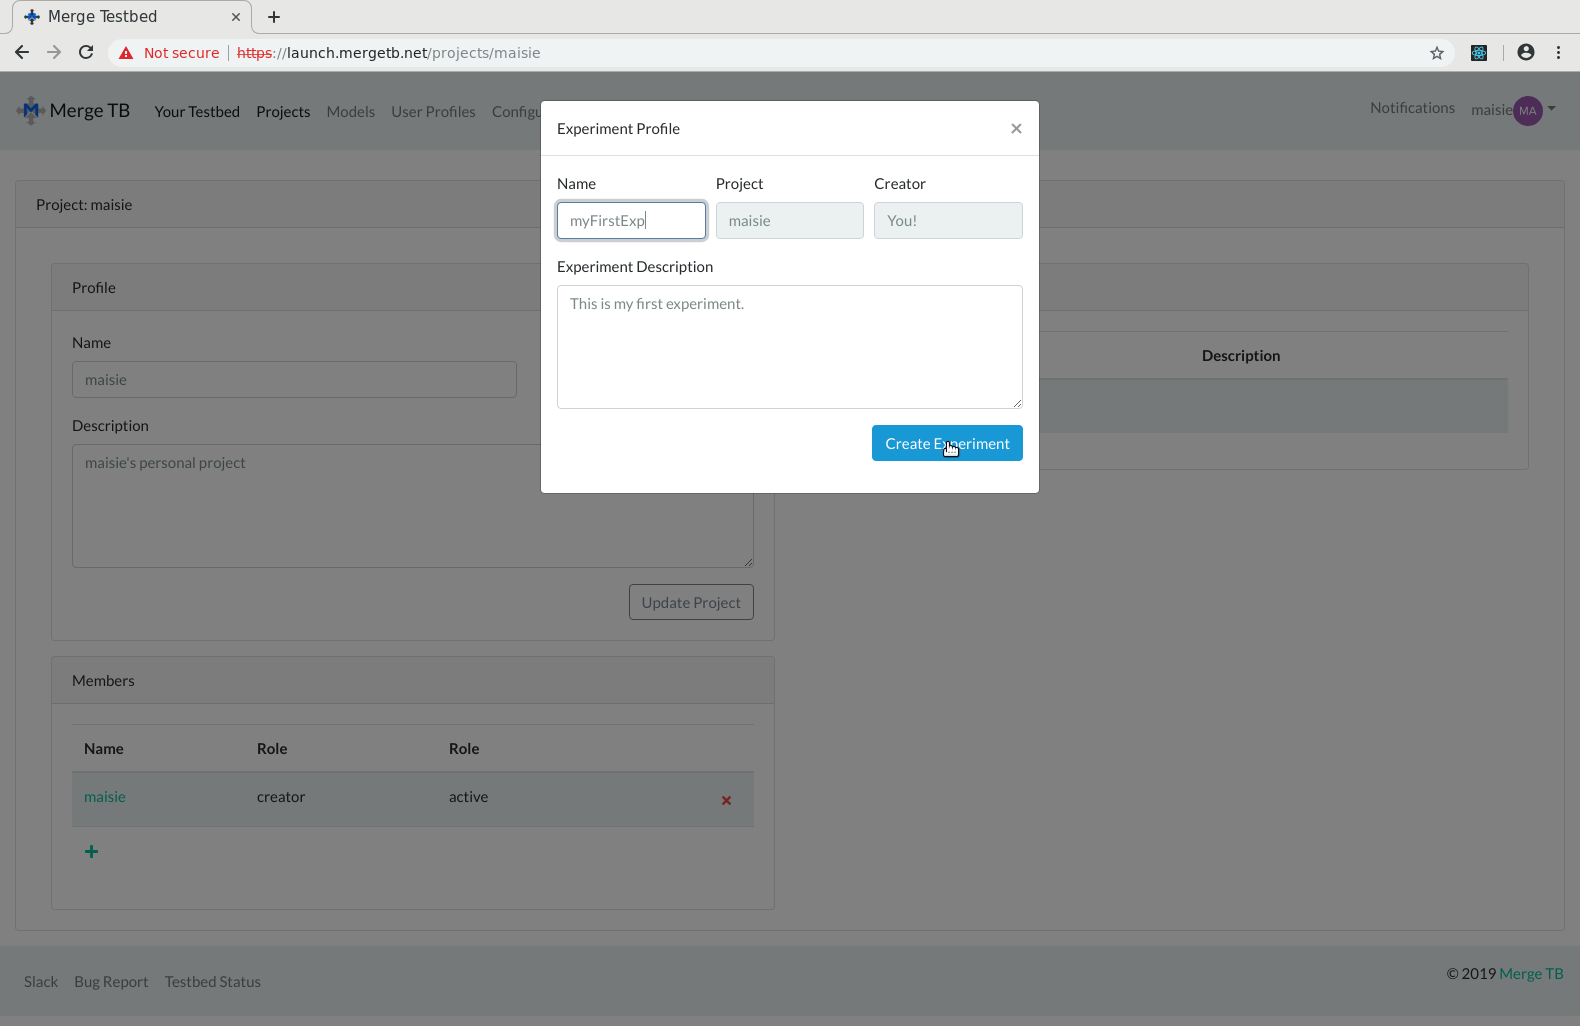
Fill out the experiment details, including the experiment name and description. Push the Create Experiment button to create the experiment.
Note that experiment names can only include lowercase alphanumeric characters. If you include uppercase characters, Launch will convert them to lower case before creating the experiment. In this case we create an experiment called "myfirstexp".
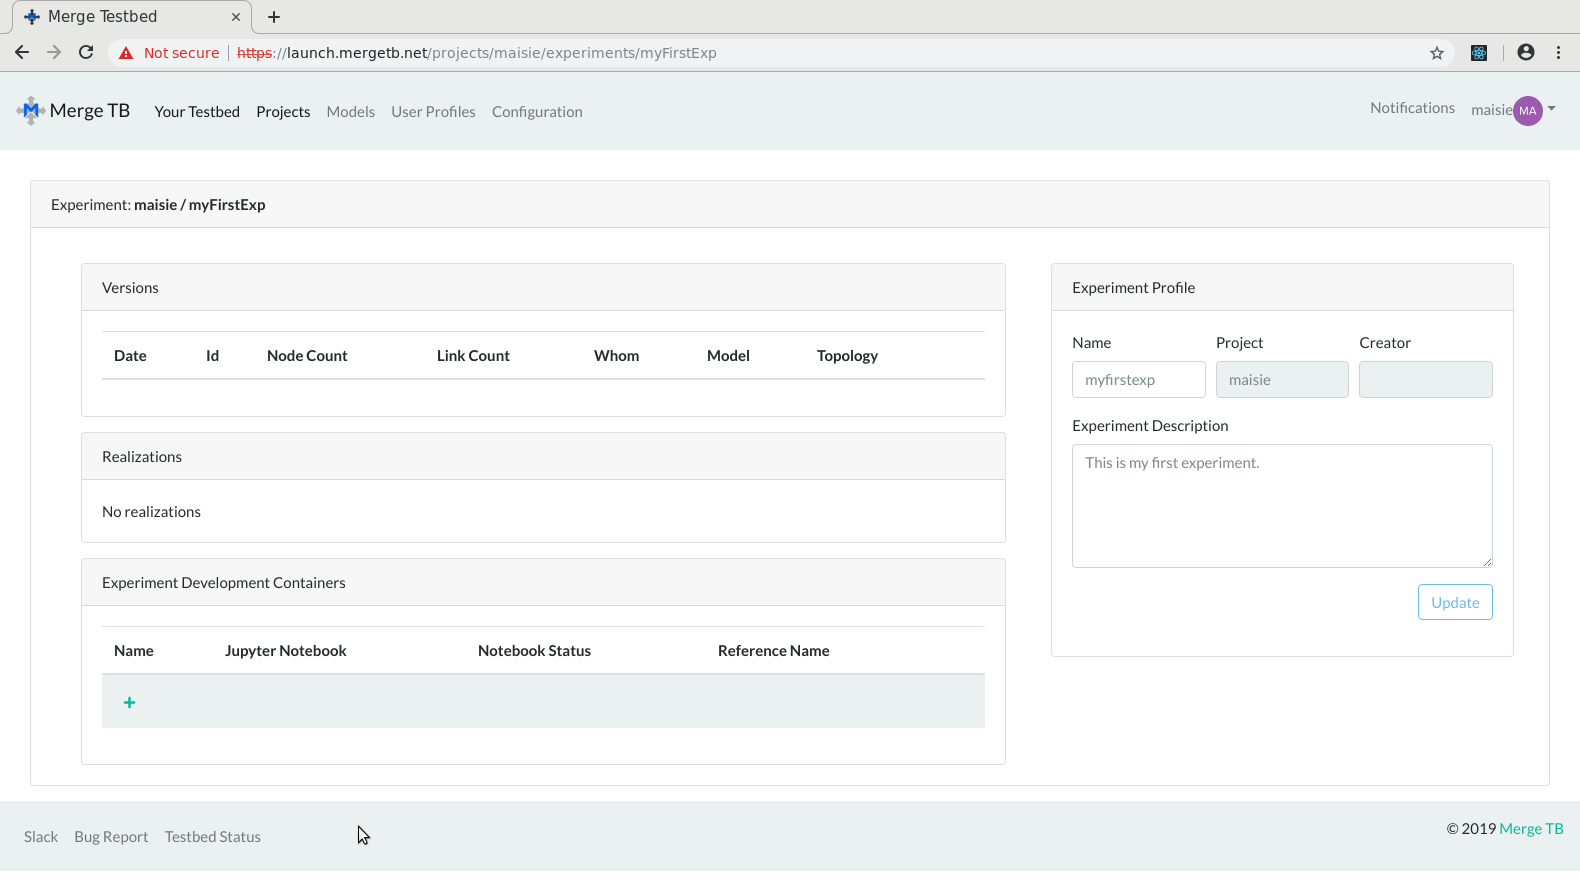
Once created, the experiment is shown in the list of experiments for the project. When you click on the experiment name, you are taken to the experiment view. Note there are no details about the experiment as it's empty at the moment.
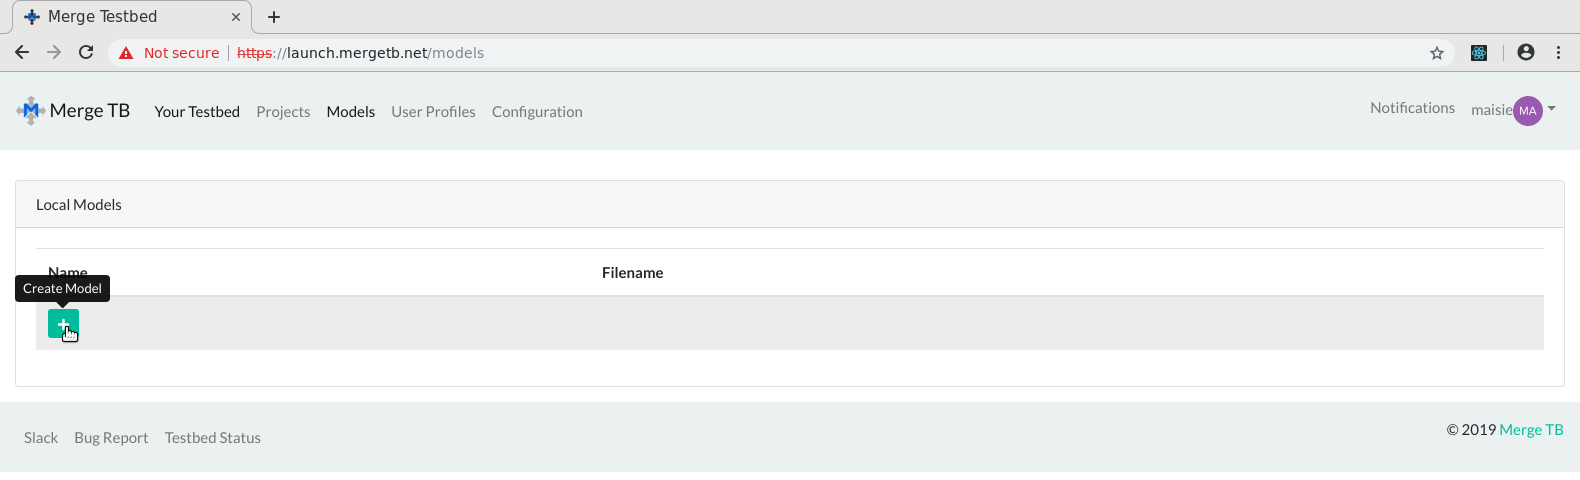
To push an experiment model to the experiment, navigate to the Model Editor by clicking the Models link in the header. Then click the + in the Local Models table as shown here. This will spawn the Model Editor.
From this dialog you can load an existing model by clicking Choose File or create a new model by not choosing a file. (If you don't load a file a basic model will be loaded for you.) In this case, I've loaded the lan3 model from our library of models at https://gitlab.com/mergetb/models.
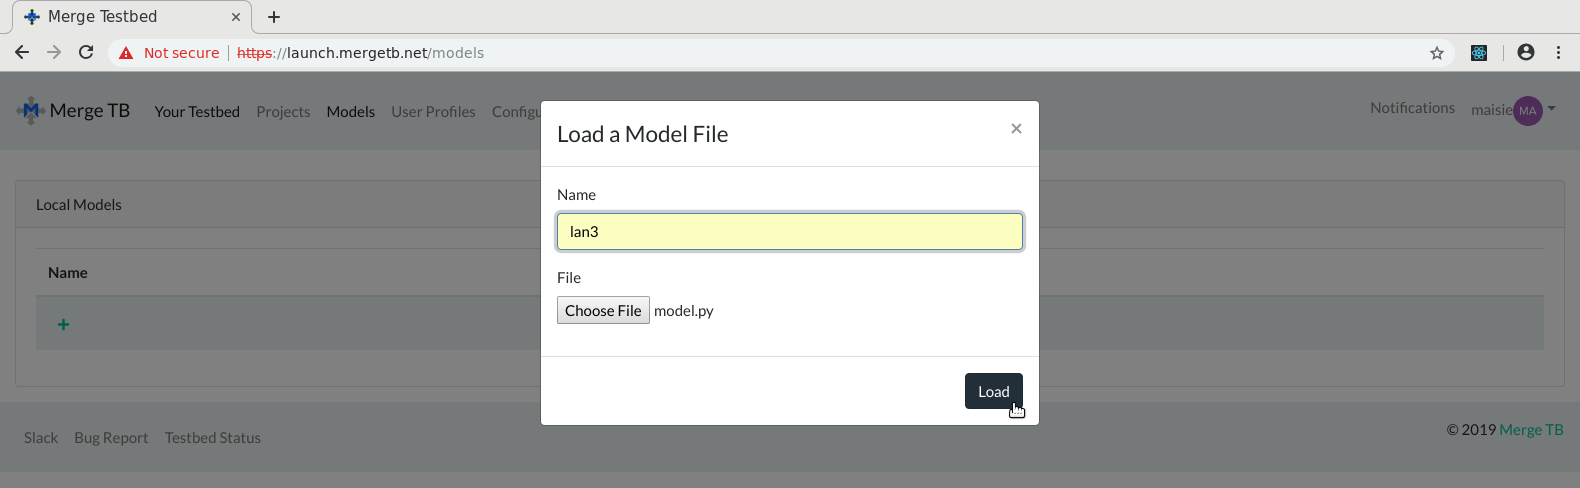
Loading a model will take you to the Model Editor as shown below.

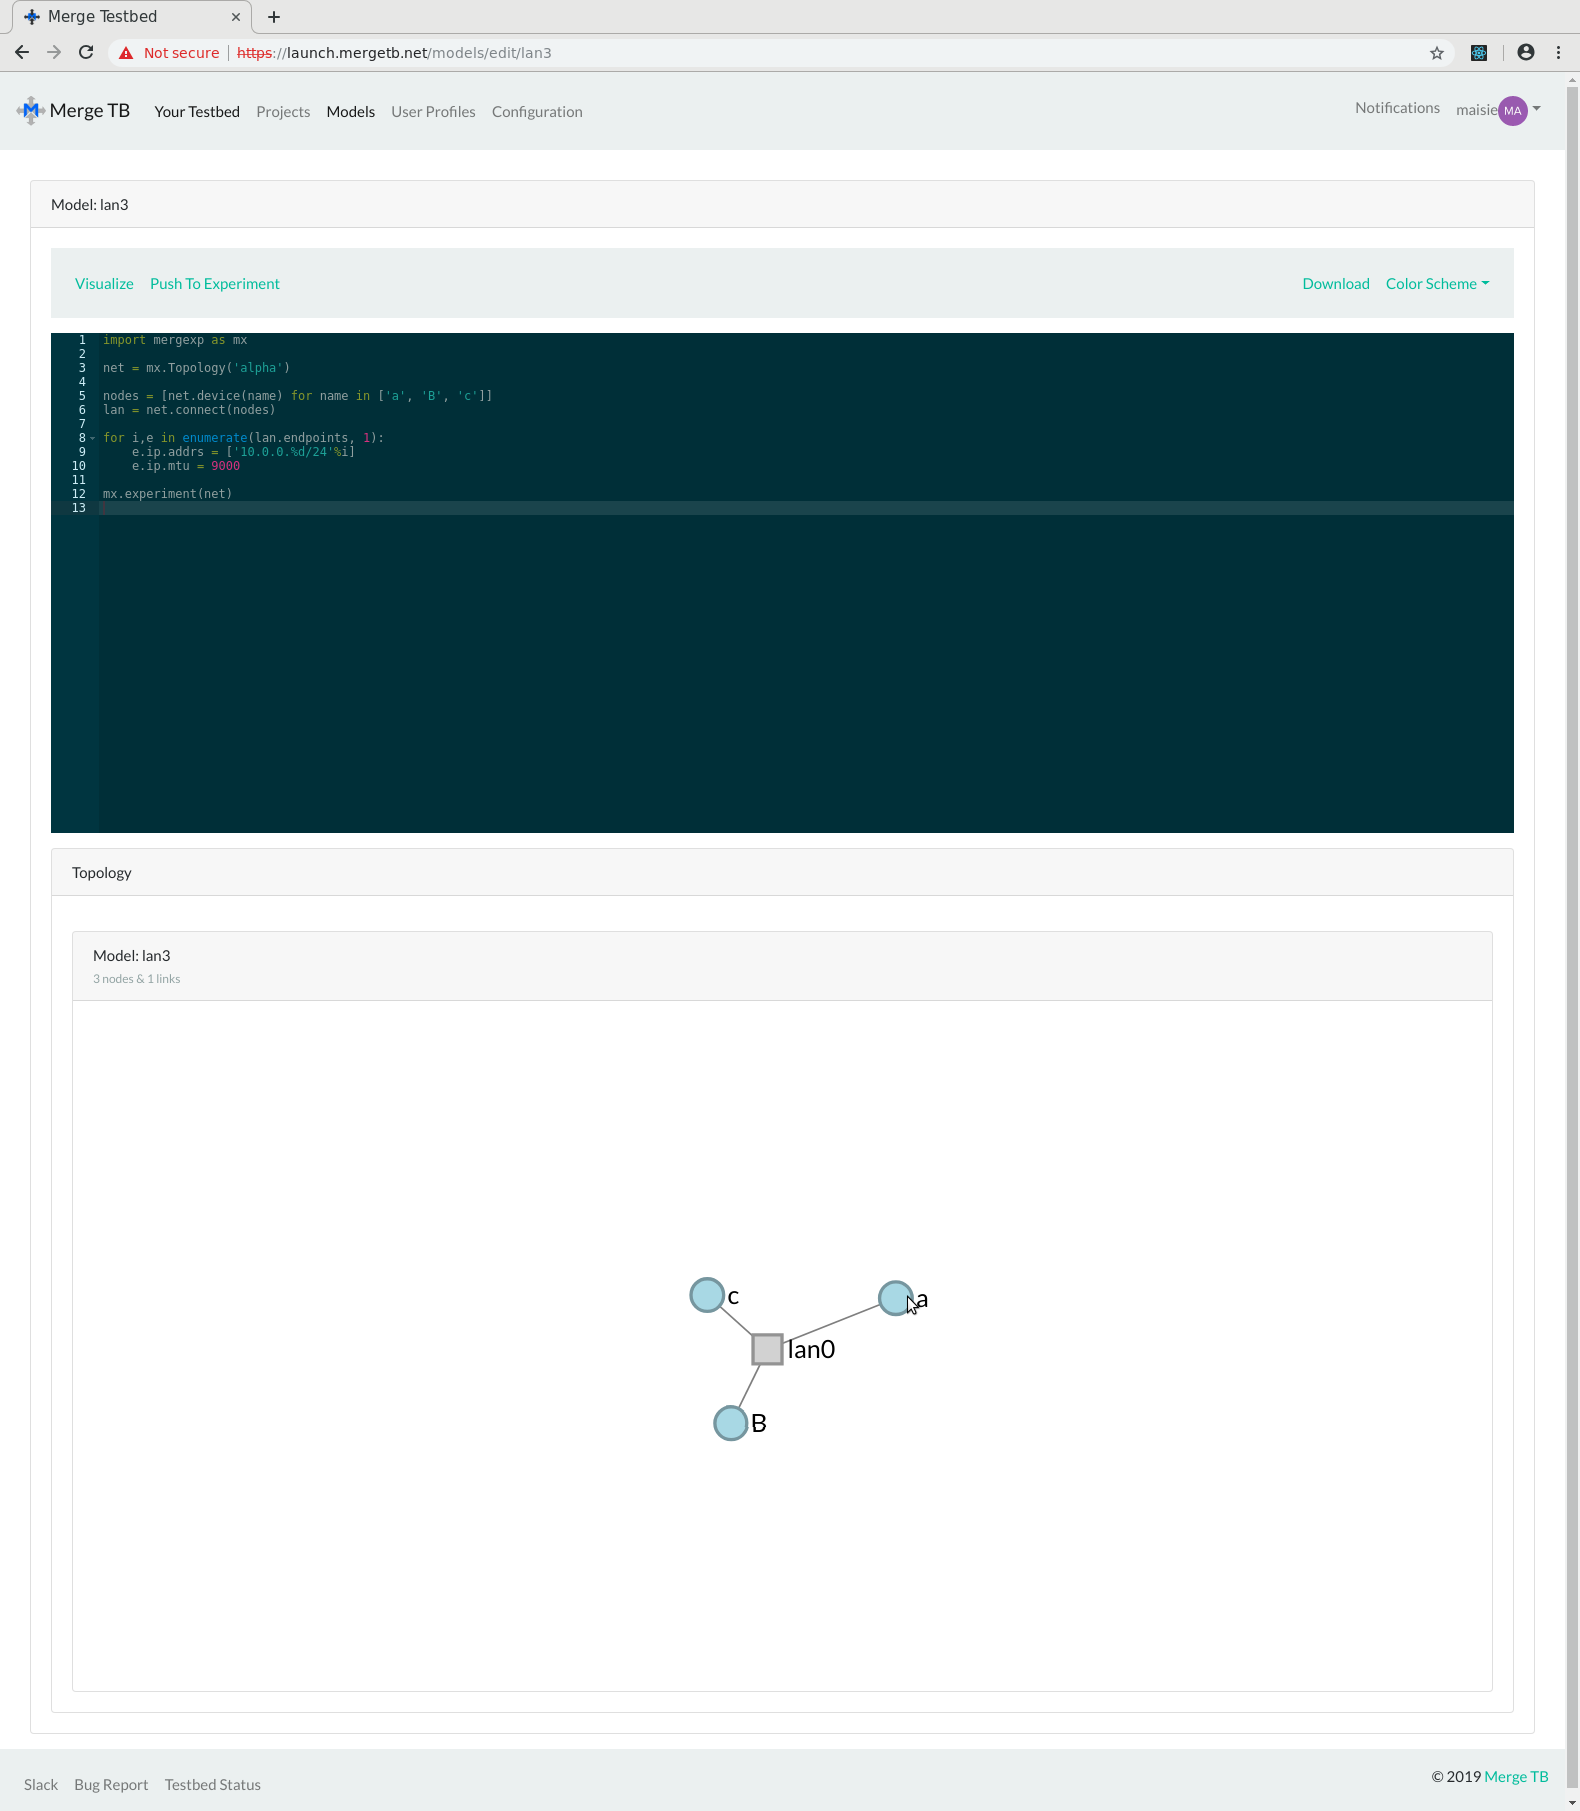
From within the Model Editor view you can edit, visualize, and save (download) models. You can also push a model to a new or existing experiment.
To confirm the model will compile and generate a valid topology, push the Visualize button. When the button is pushed, Launch sends the model to the Merge Portal to be compiled and the topology for the model is returned. This is then displayed beneath the editor as shown here.
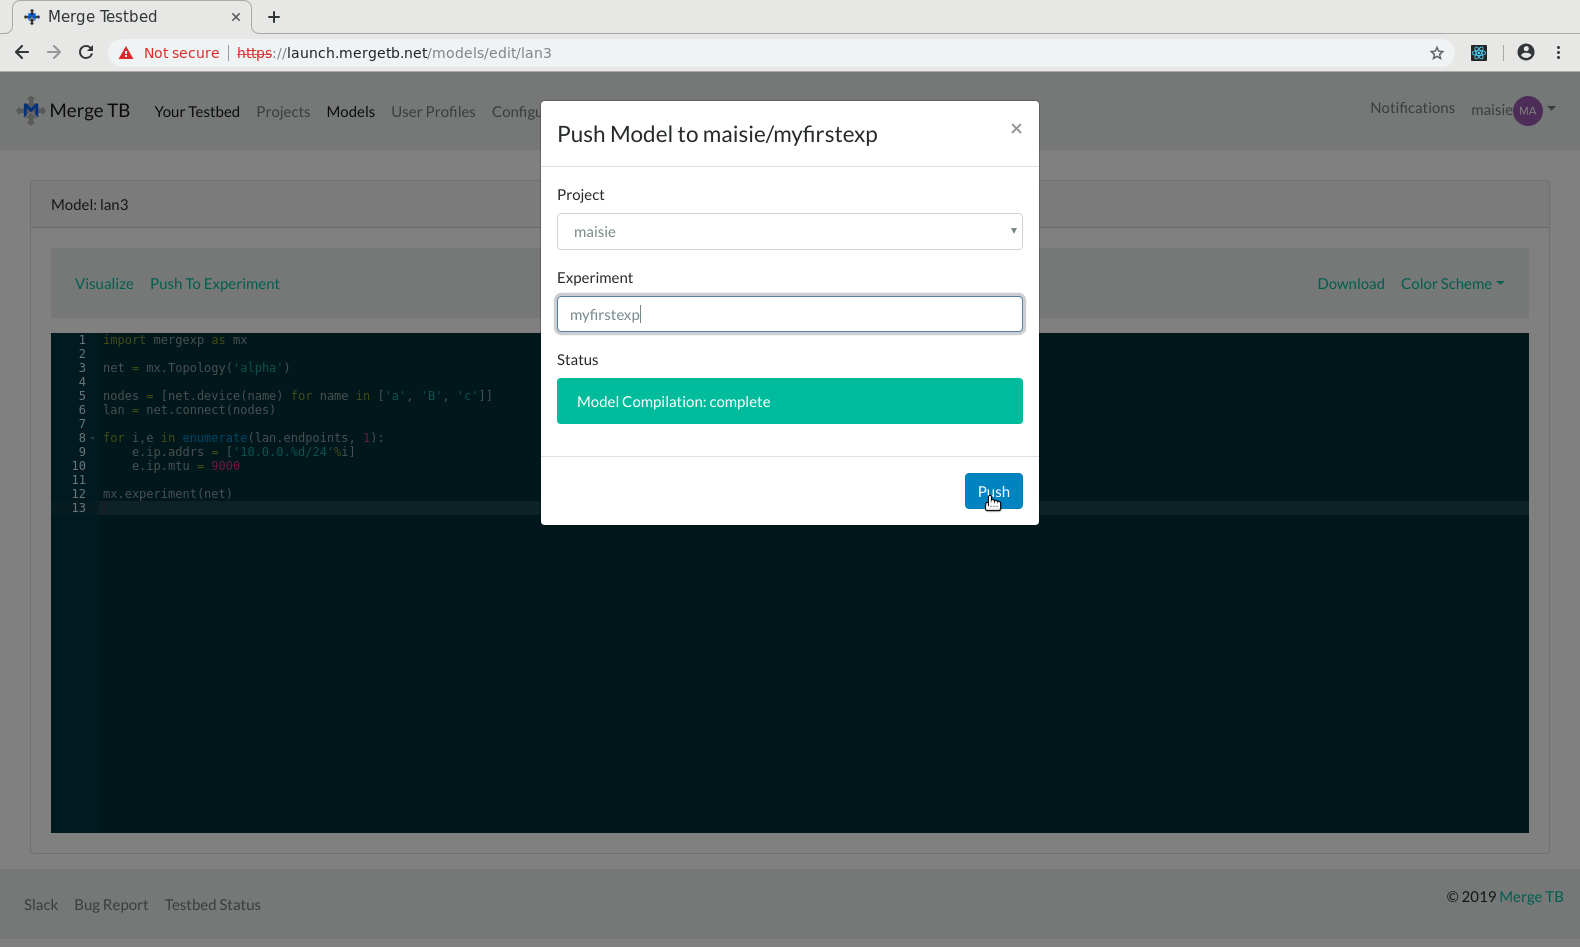
Once you've confirmed the model is valid by visualizing, you push the model to an experiment for realization. Click the Push To Experiment link in the model editor header. This will spawn a pop-up dialog that lets you push the model.
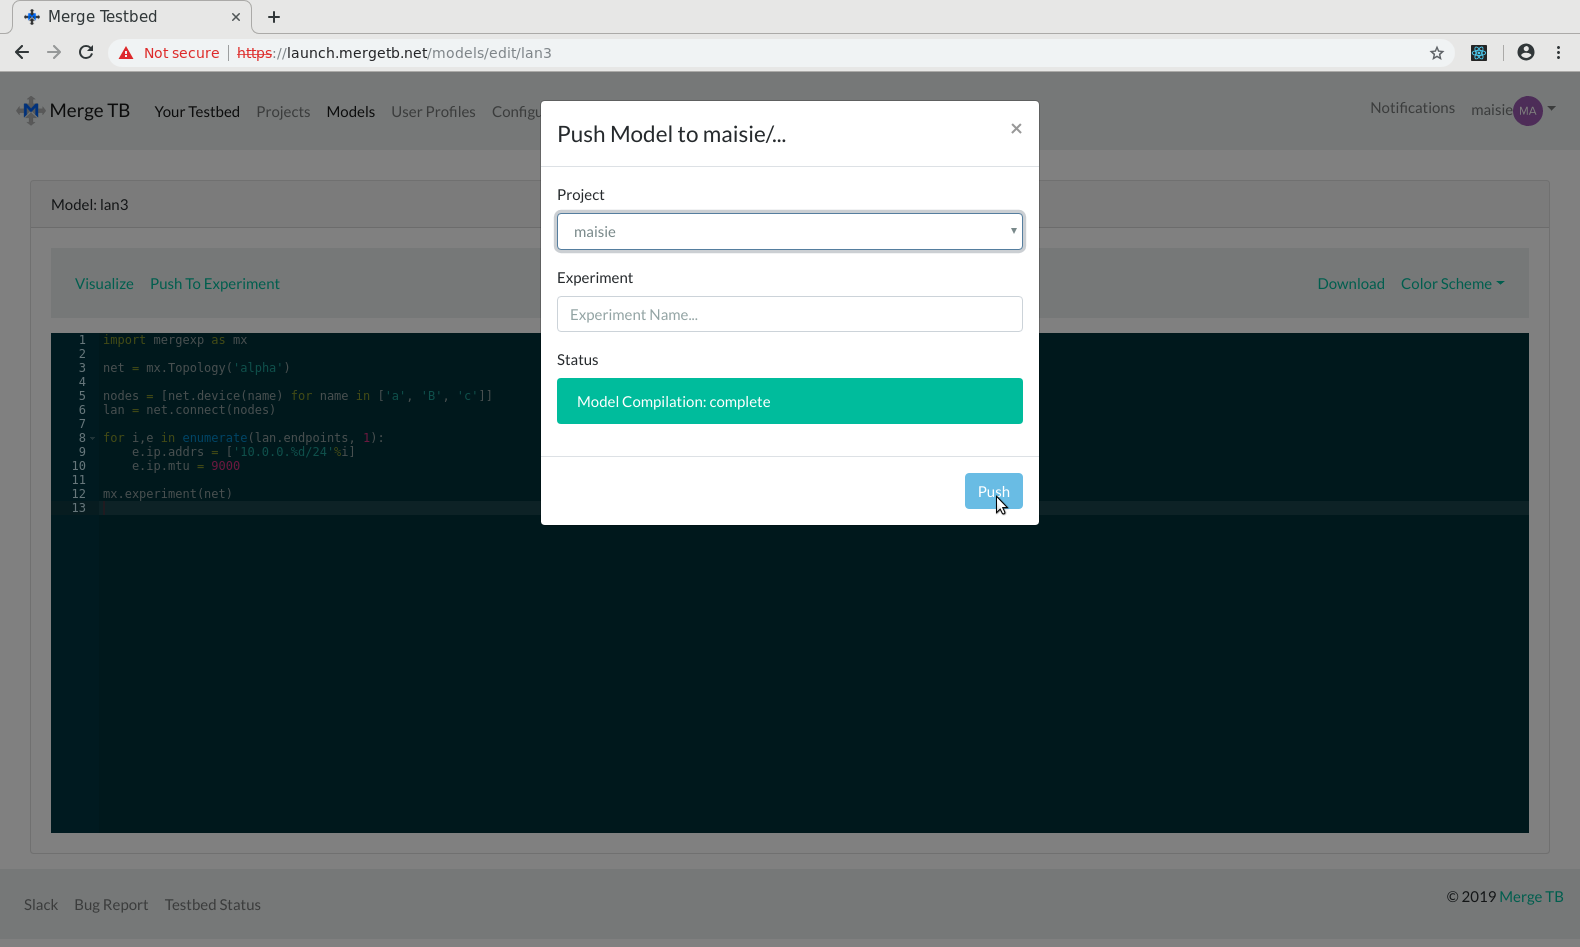
Choose the experiment you want to push the model to via the Project drop-down. (This drop down is populated with projects you have access to. Note that you only have access to your personal project at this point.) The Experiment drop-down is populated with experiments within the chosen project that you have access to. If you change the project, the list of available experiments will change. If you type in a non-existent experiment, a new experiment will be created. (The dialog will warn you when creating a new experiment.) In this case, we choose the experiment we created above, "myfirstexp".
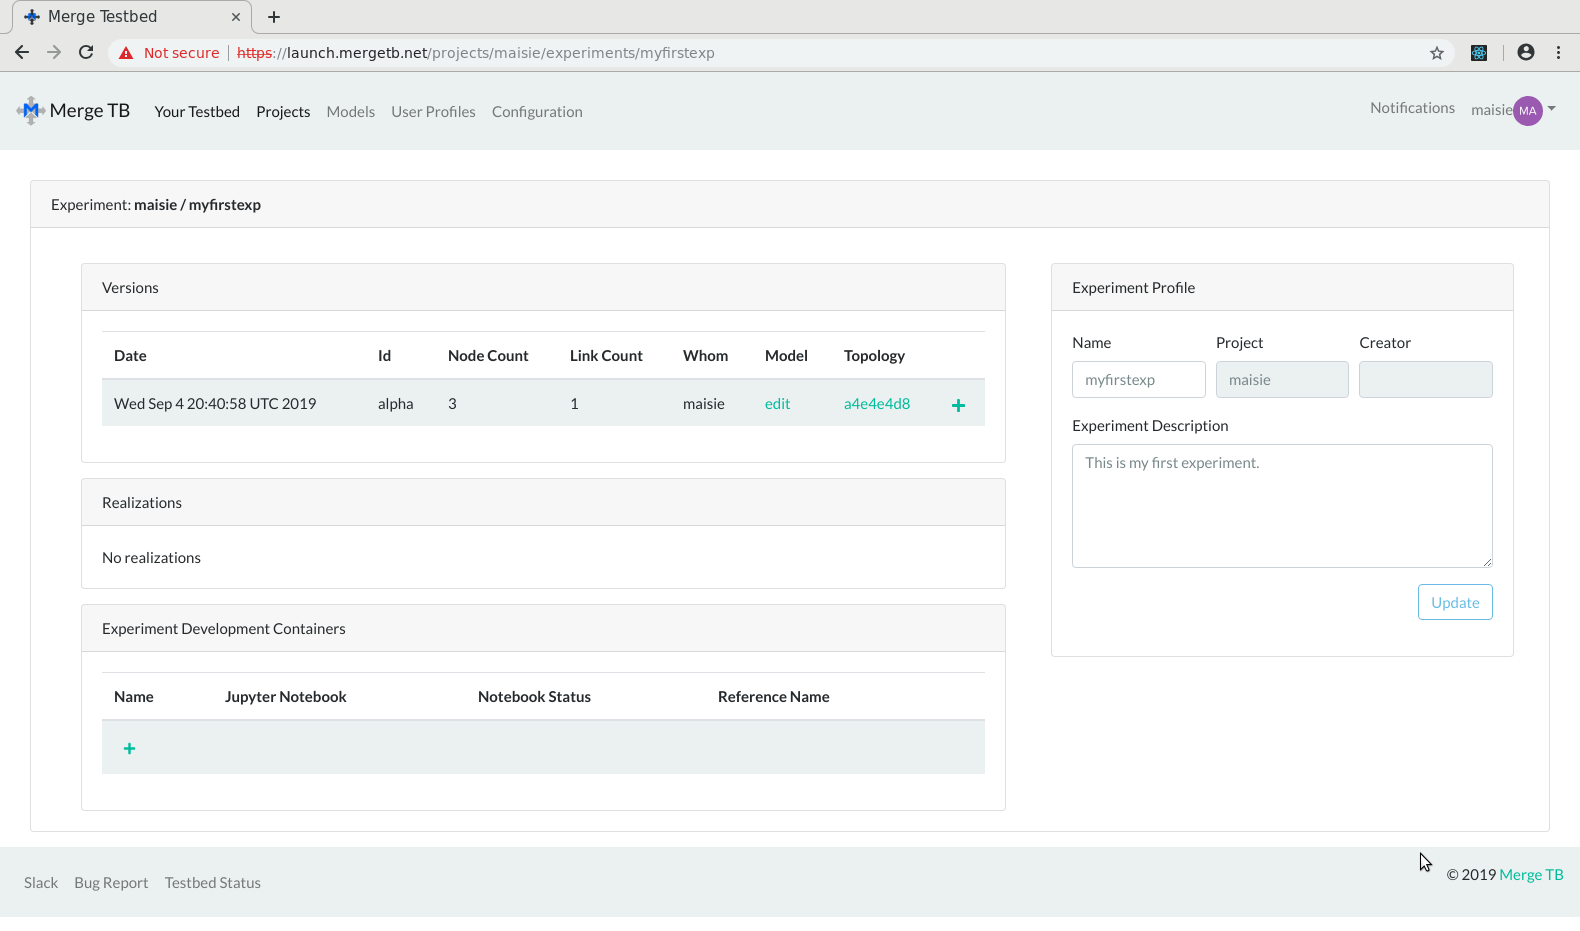
Once pushed, you will be returned to the editor. To see your new experiment model, navigate to the experiment page (Your Testbed, myfirstexp). You can now see there is an entry in the Experiment Versions list. From this entry you could edit the model more or view the existing topology of the experiment version.
Realize Experiment Model
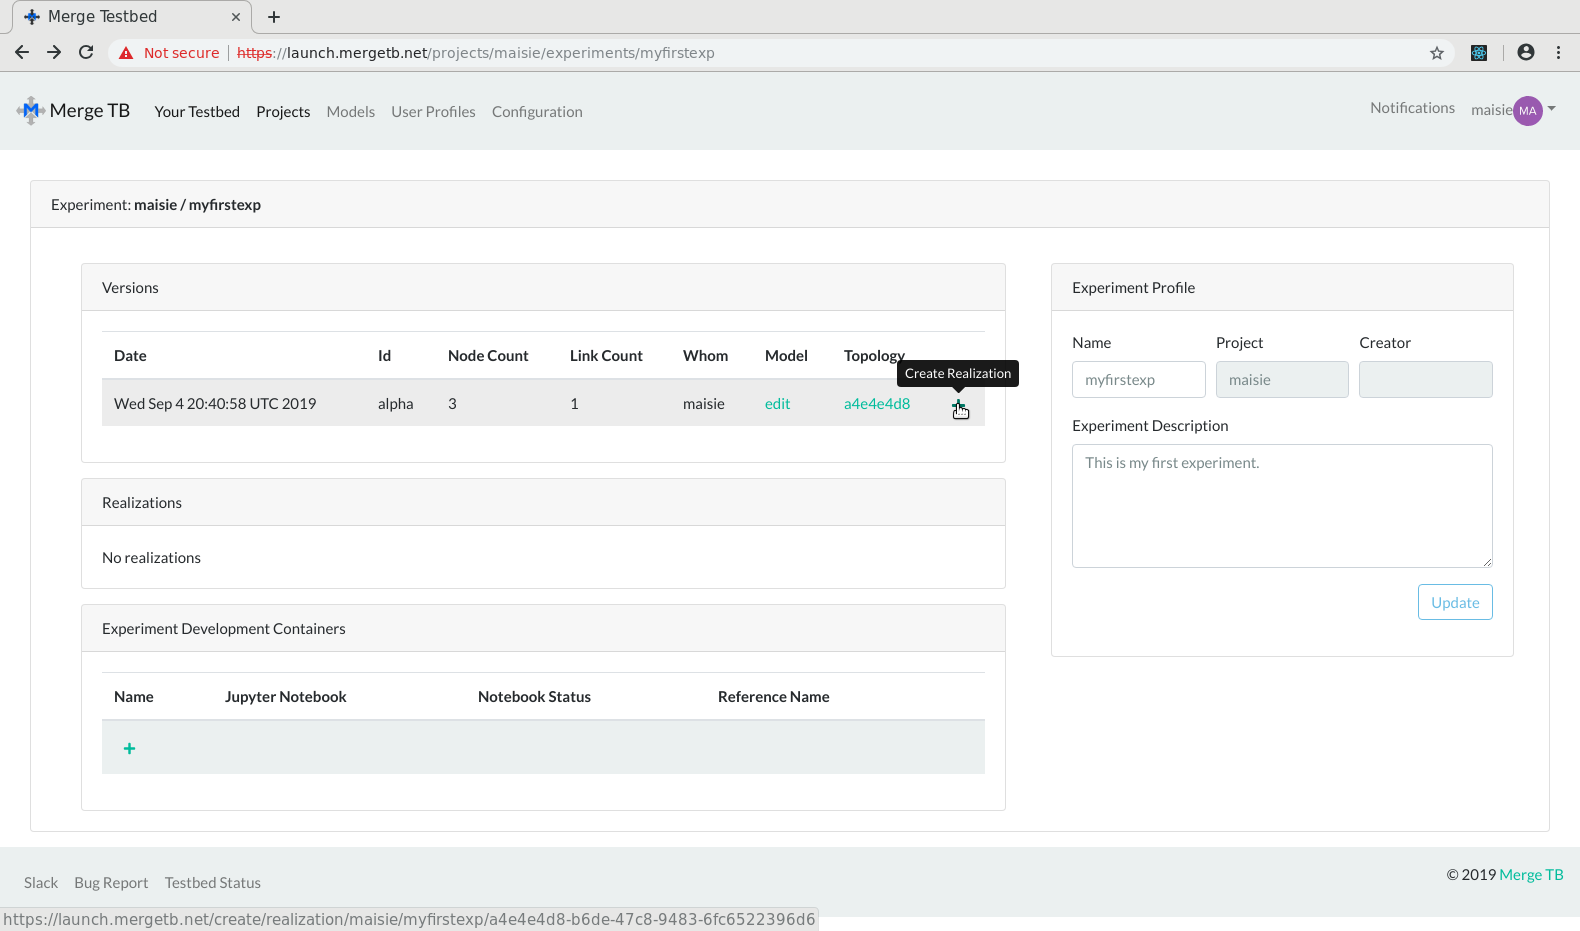
Choose the version of the model you wish to realize, in this case there is only one version. Click the + next to the version.
If you want to see the model, you can click the Topology of the model. This will show a basic visualization. If you want to edit the model (and possibly push a new version), you can push the edit link in the Model column.
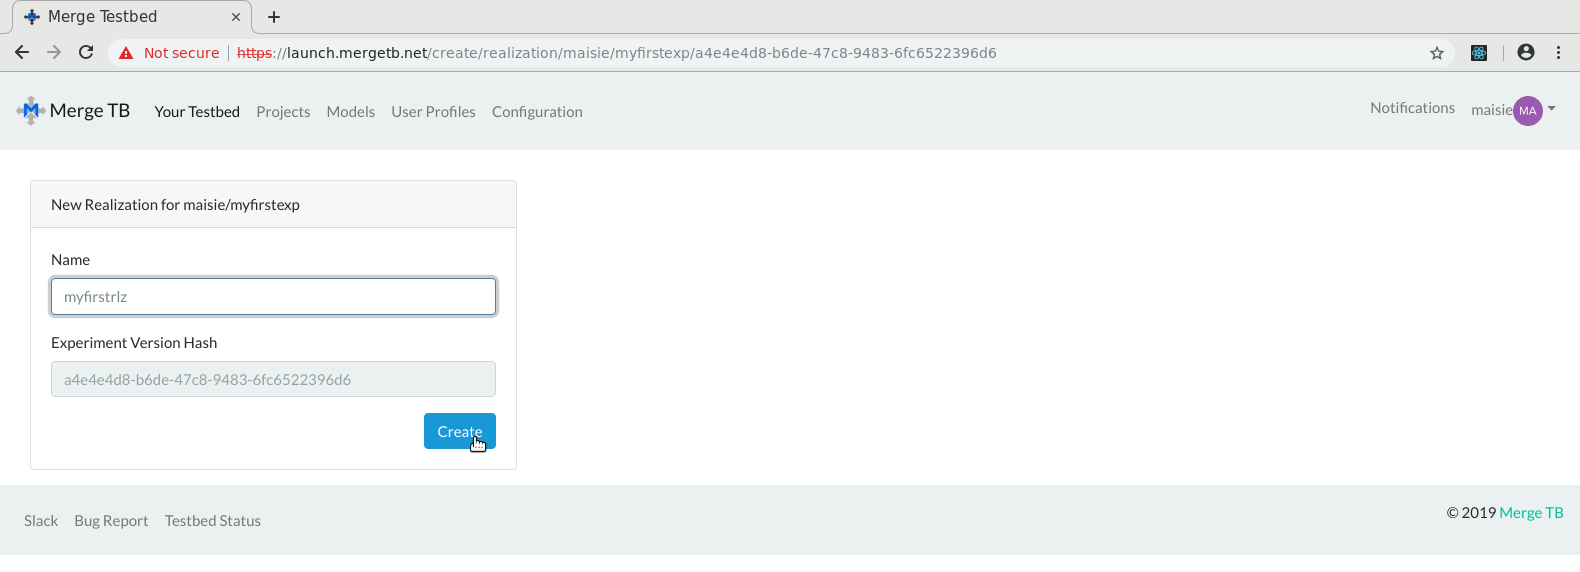
Choose a name for your realization and click Create. In this case we chose to name the realization "myfirstrlz".
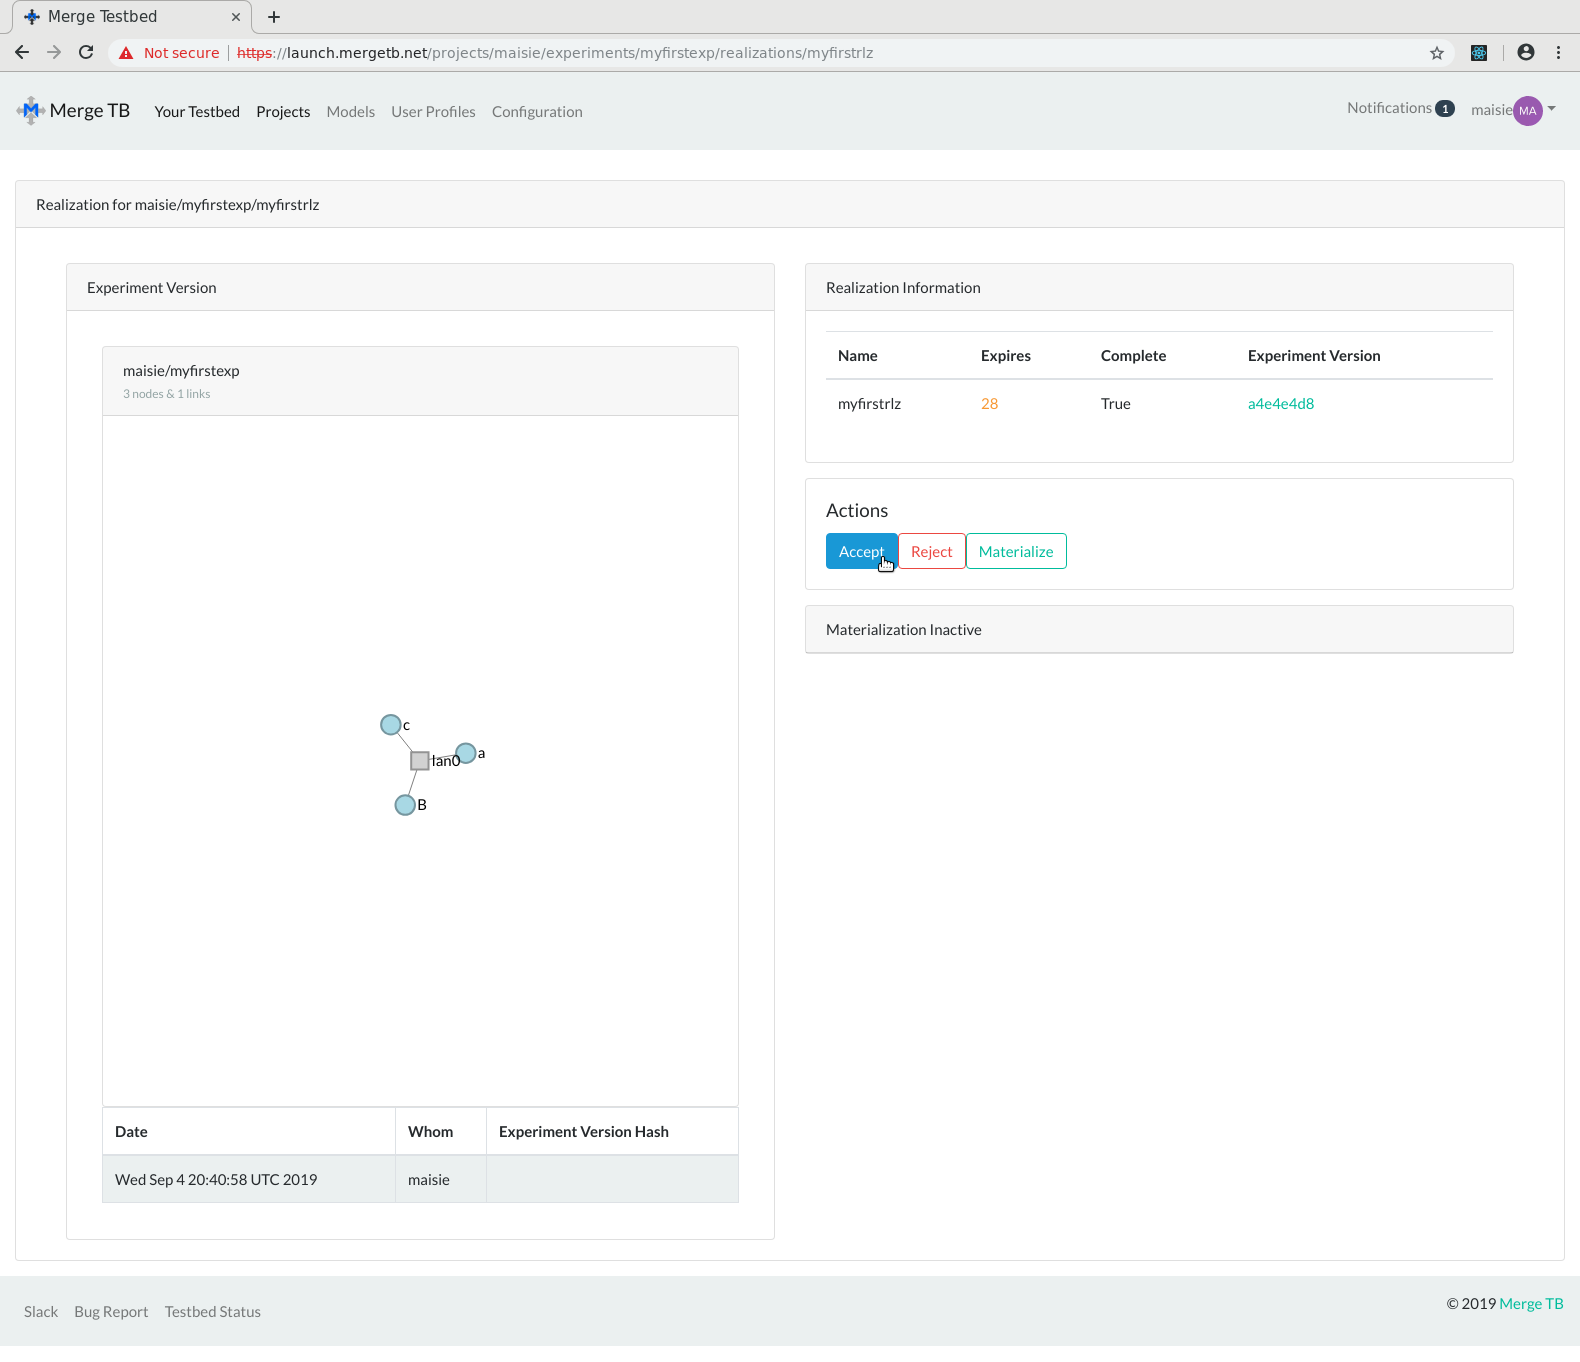
After a short pause, the realization is created. Your experiment has reserved actual testbed resources for a short time. You may view the model, and if it meets your needs, you accept the realization.
Click the Accept button to reserve the testbed resources until you free them. These are now your resources until you free them.
Note that if you do not accept before the count down, your testbed resources will be automatically un-reserved and you'll need to re-realize the experiment model.
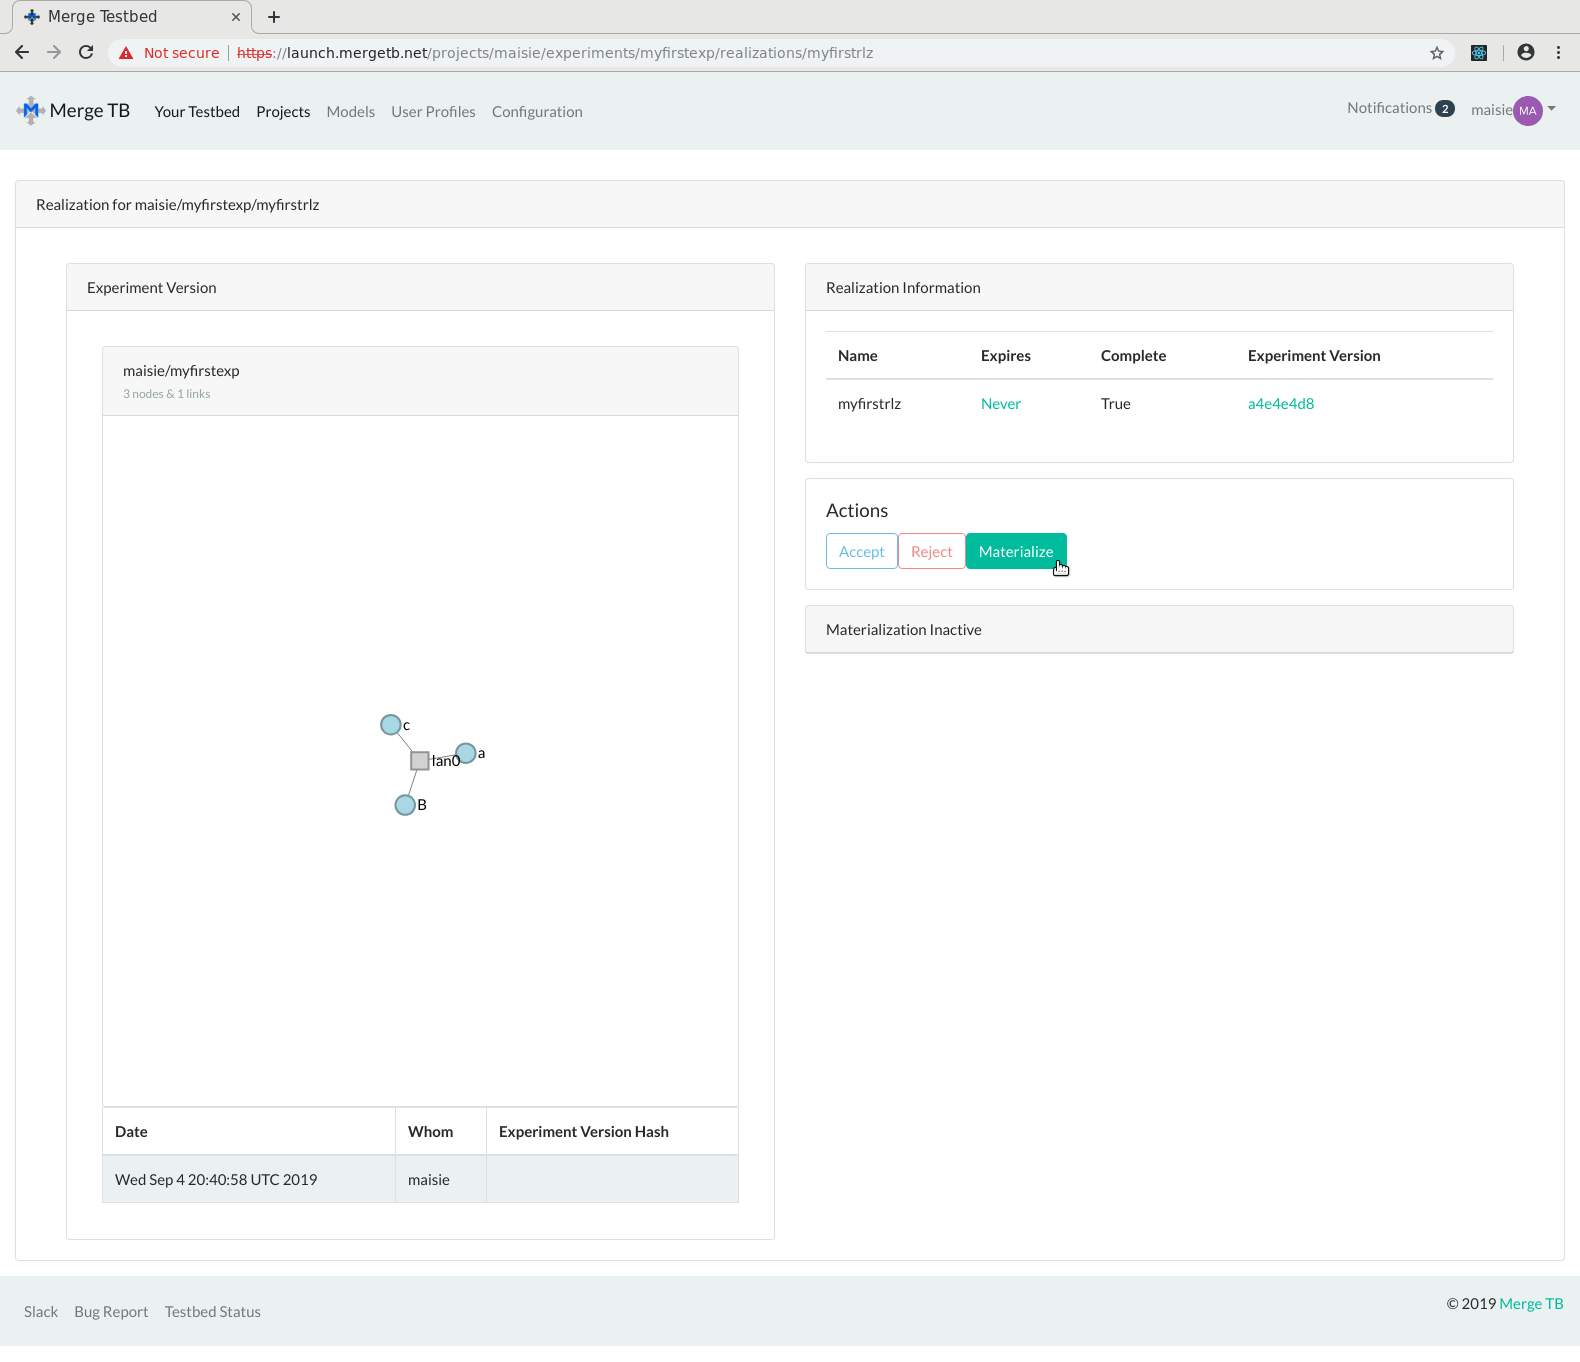
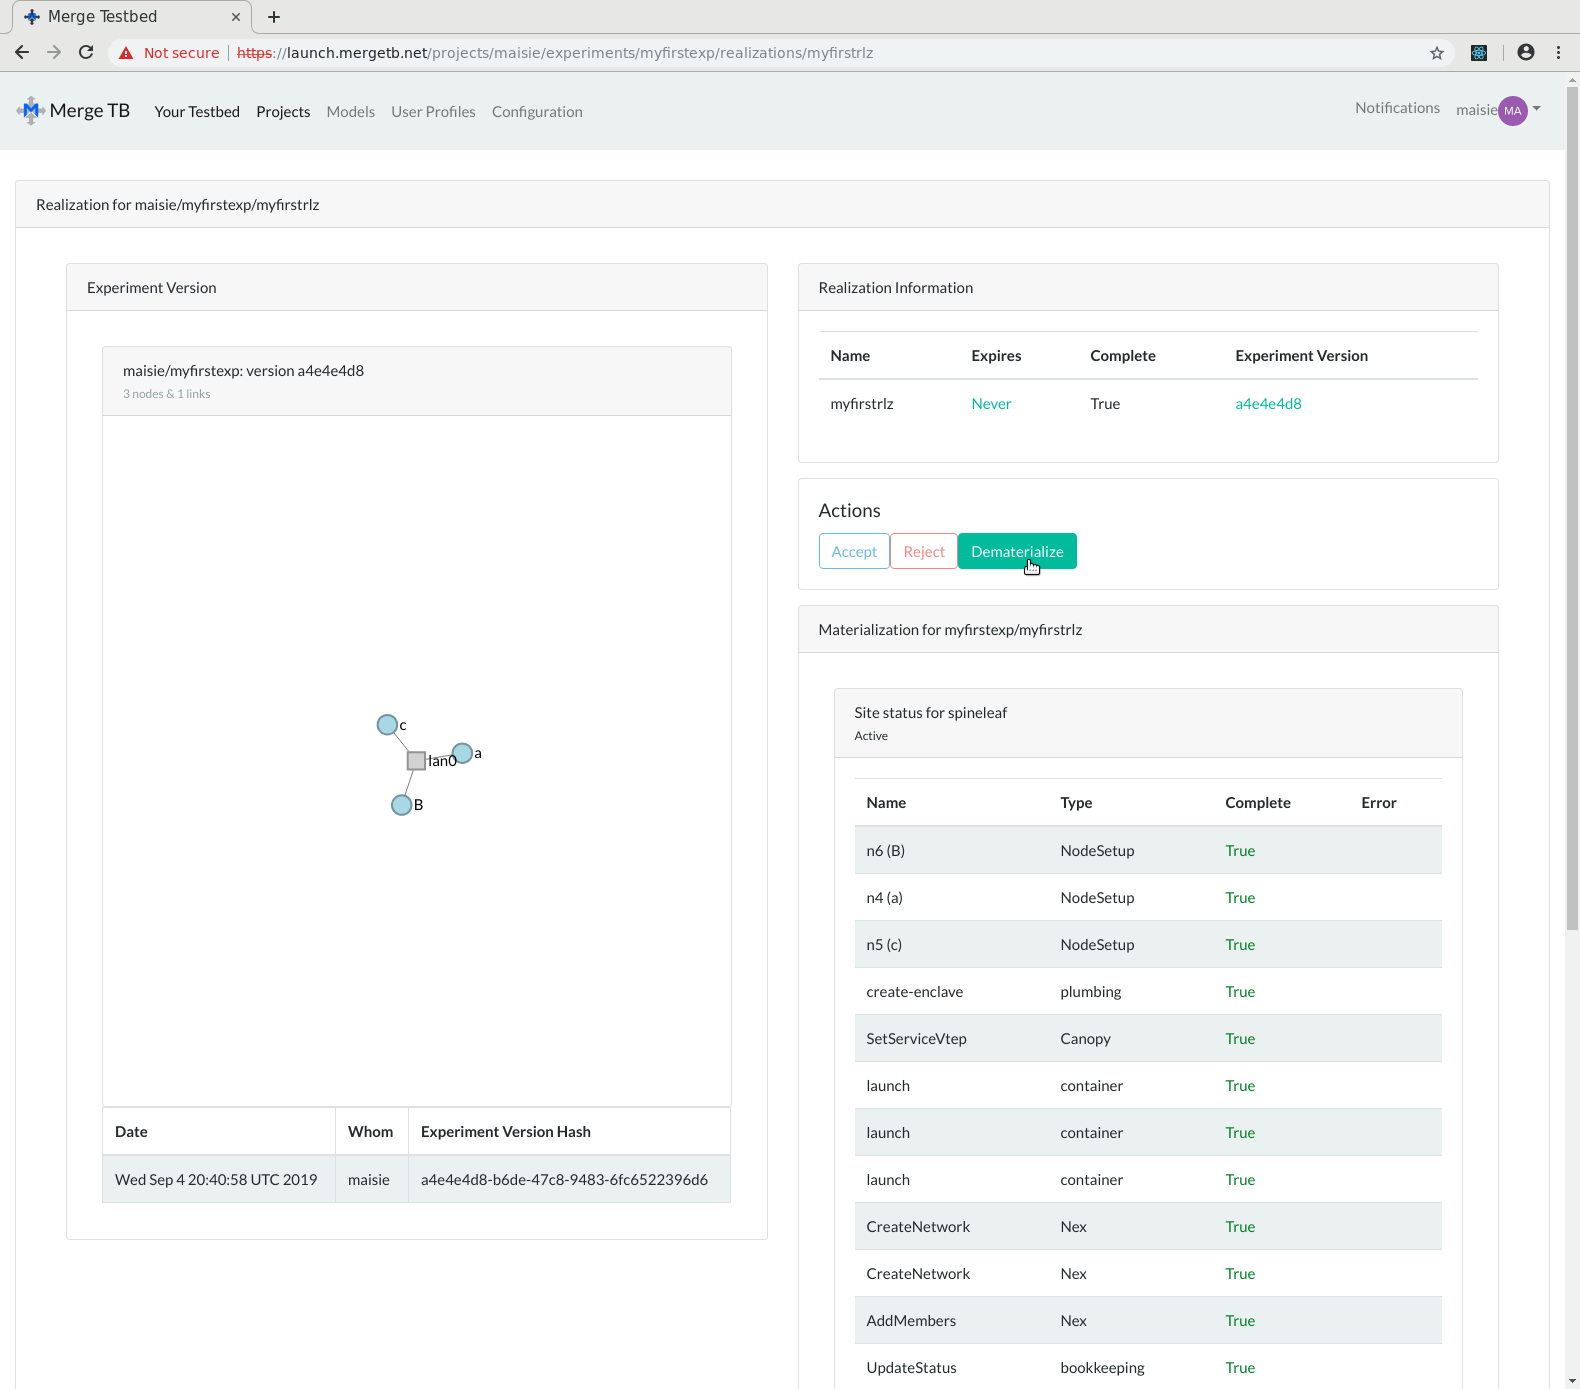
Once accepted, the testbed resources are yours. Note the expires column is now Never. To materialize the realization, click the Materialize button. This will cause the testbed to image the nodes and create the experiment model on the testbed itself. When this is complete, the experiment is ready to be used.
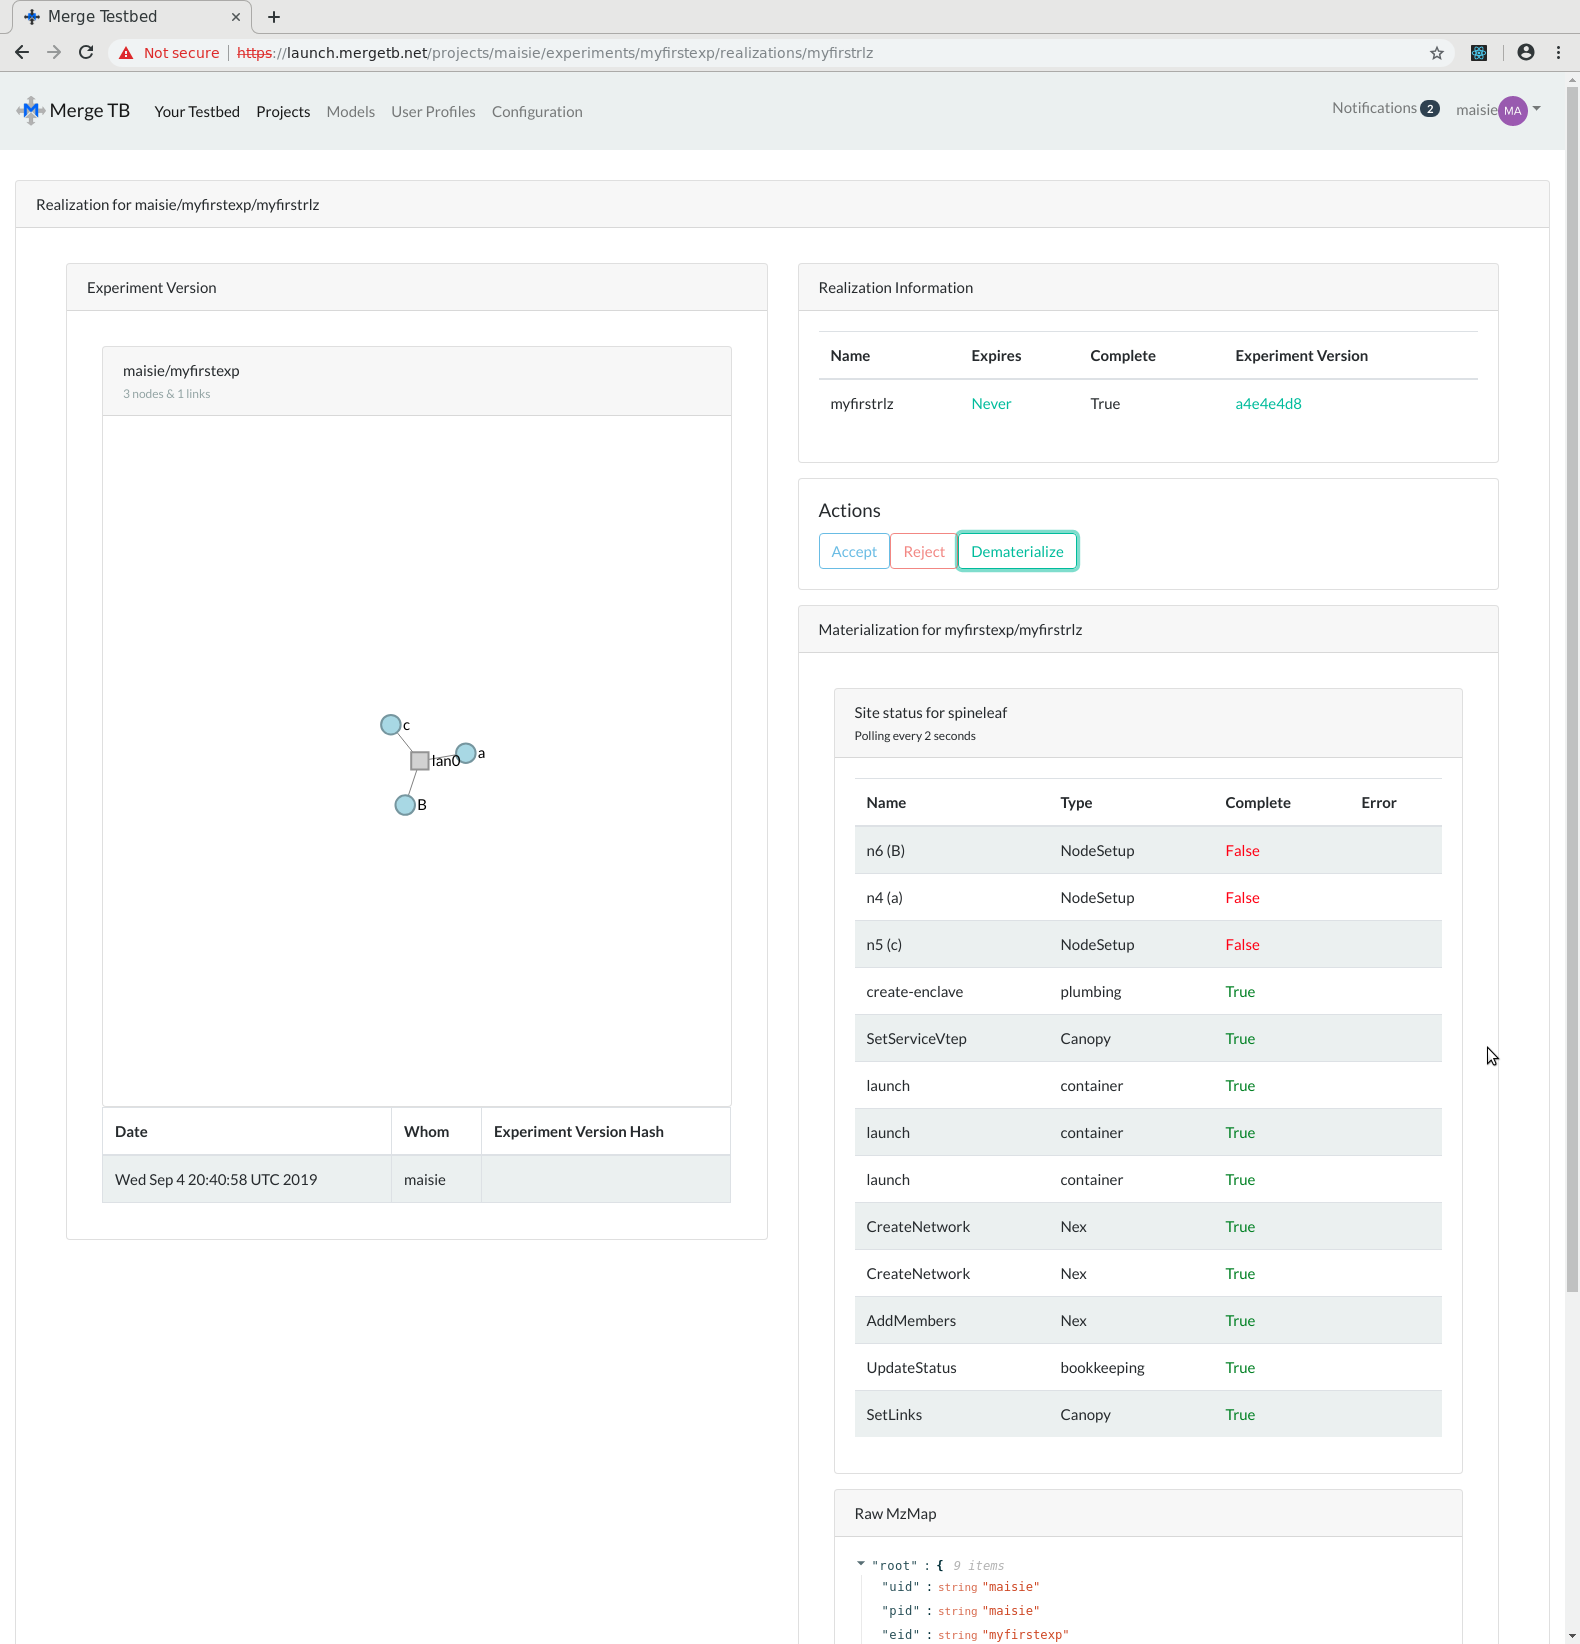
After the Materialize button is pushed, the materialization begins. Launch will poll the Merge Portal for the materialization status every two seconds until the materialization is complete. Here is an experiment being materialized. Note the list of materialization tasks are not complete. (Some are still in a False completion state).
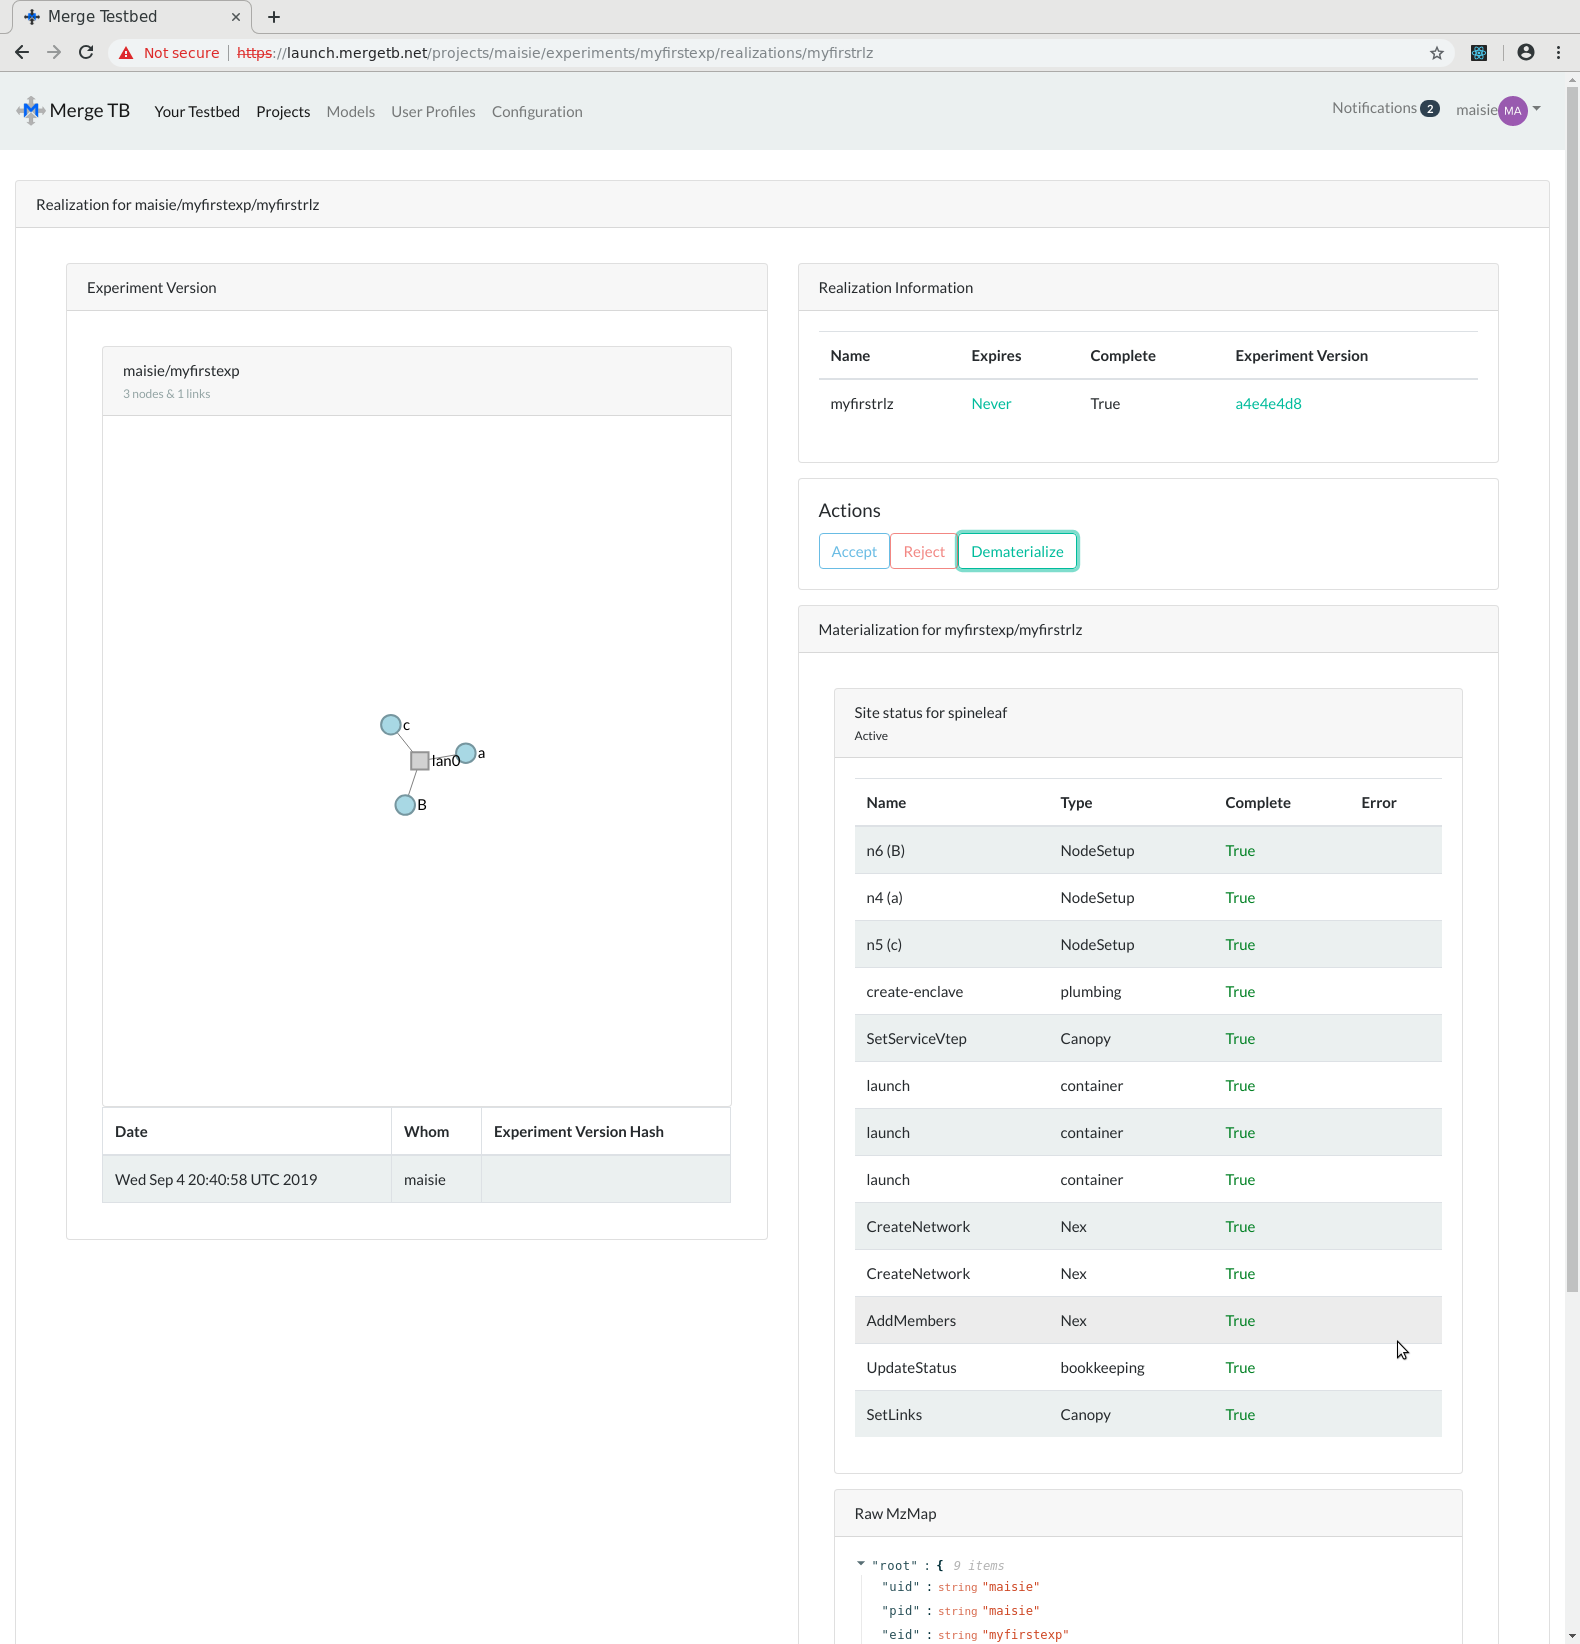
After a few minutes all materialization tasks are complete and the experiment is active.
Connecting to Experiment Nodes
At this point, the experiment is active and the nodes are imaged and the topology specified by you is configured.
You connect to your experiment nodes through an Experiment Development Container (XDC). You spawn this container as needed to interact with your experiment. The XDC comes installed with the mergexp library for
experiment design, mergetb, the command line tool for interacting with a Merge testbed, and a Jupyter Notebook interface (and its web-based terminal).
The base XDC image is Ubuntu 18.04 (LTS) and has internet access for installing any needed software (using apt or apt-get). Persistent per-project directories and persistent user home directories are mounted on each XDC.
Let's walk through connecting to and using your experiment nodes.
- Create an XDC in an experiment
- Connect to the XDC
- Attach to the experiment materialization
- Use the experiment nodes via SSH
- Detach from the experiment
- (optional) Delete the XDC
Create an XDC in an experiment
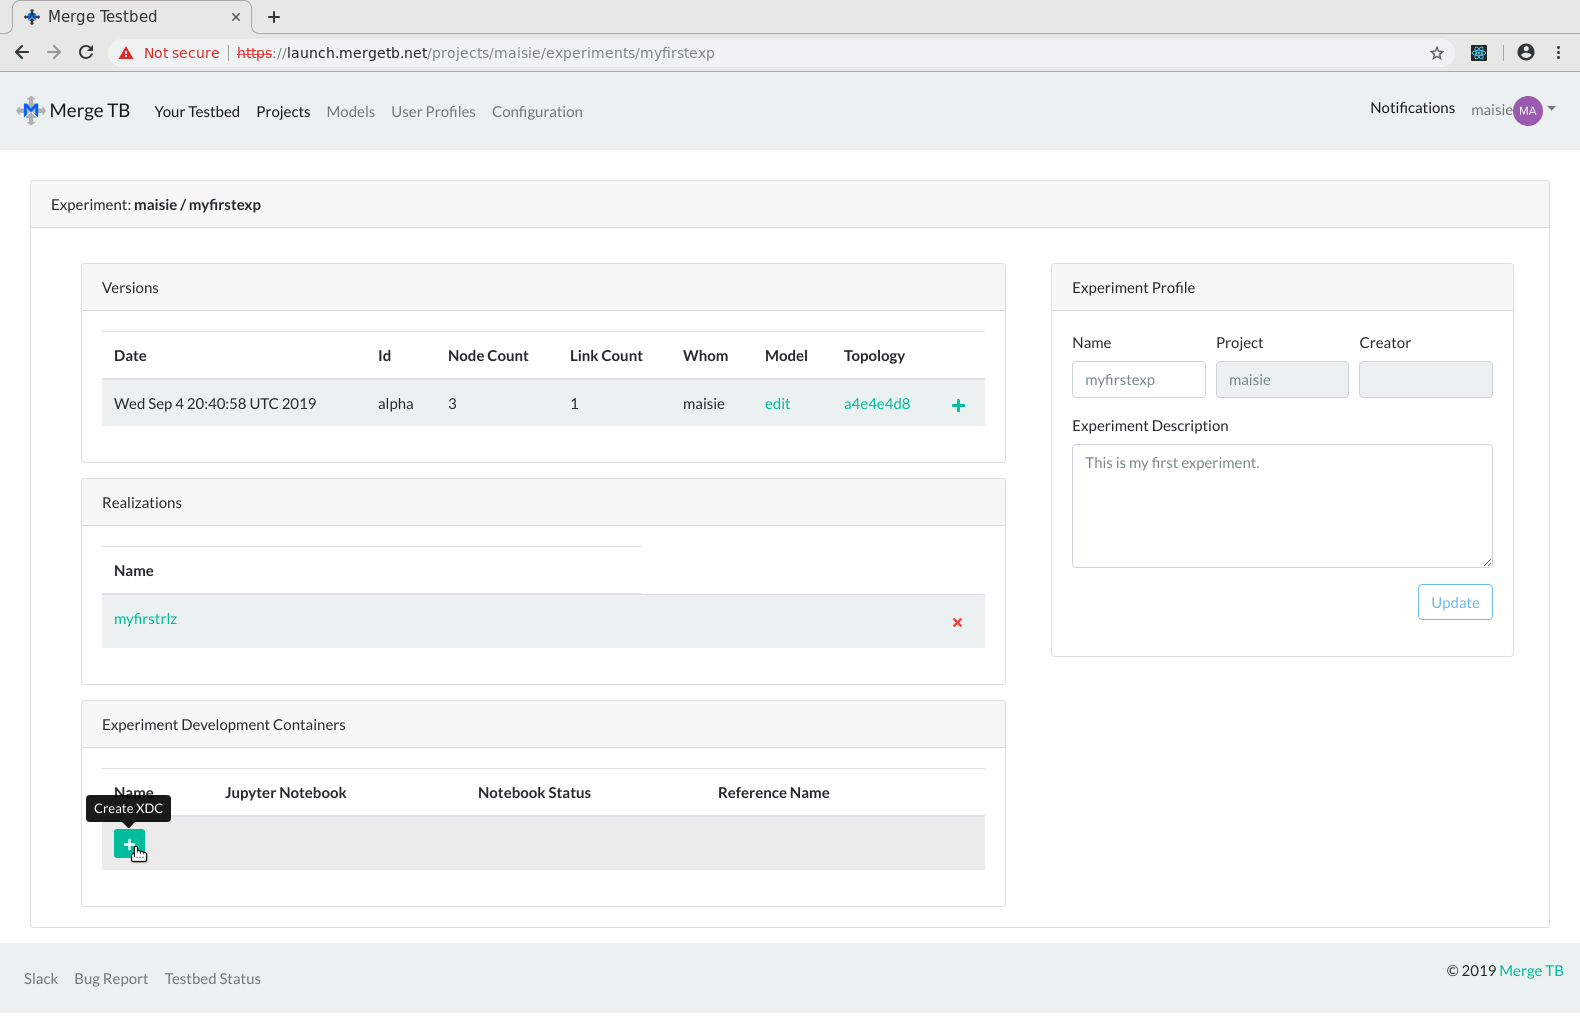
To create an XDC in an experiment, navigate to the experiment page (Your Testbed, click on experiment name). Click the + at the bottom of the Experiment Development Containers widget.
Clicking this leads you to a spawn XDC dialog. Choose a name for your XDC (this walk-through uses "myfirstxdc") and click Spawn XDC.
The new XDC is added to the list of XDCs for this experiment. The Jupyter Notebook field will show a loading visual until the XDC has been spawned in the portal. Once spawned, the entry will become a link to the Jupyter Notebook running on the XDC.
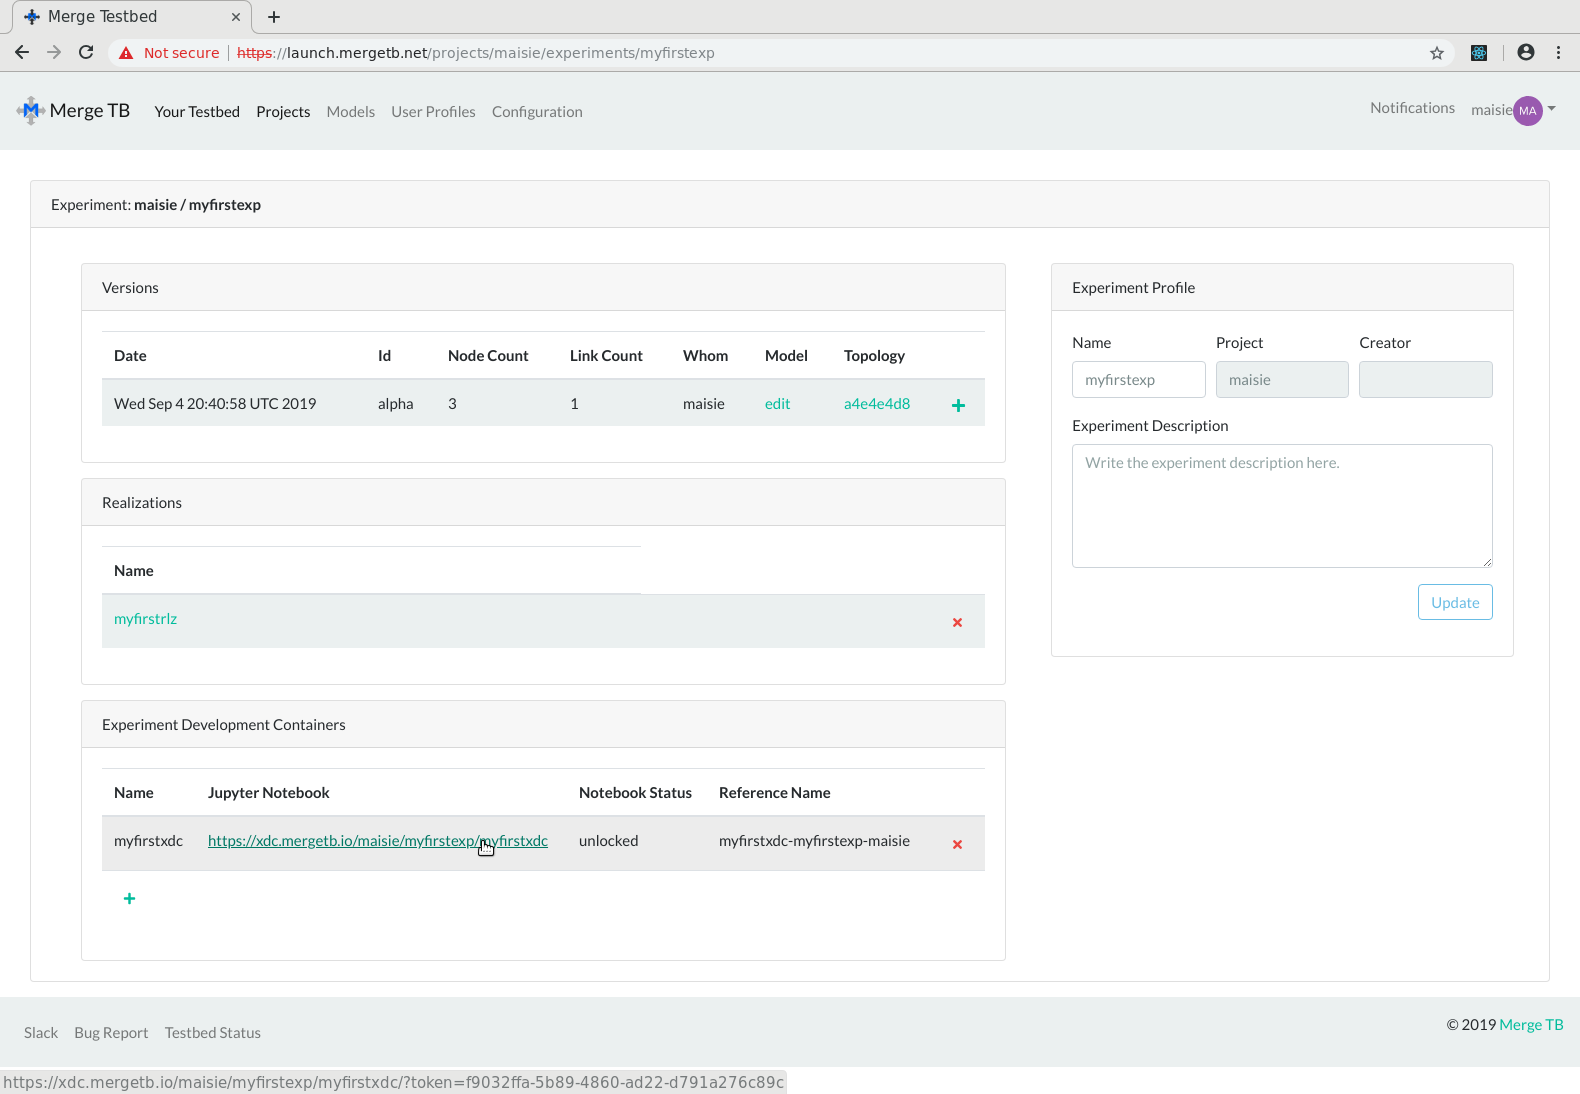
Once the XDC is created, you can login to it. From this XDC, you will be able to connect to your experiment's nodes.
Connect to the XDC
There are two ways to login to the XDC:
- use the Jupyter web-terminal to access the XDC directly
- SSH to the XDC via the Merge jumpstation
Connect to the XDC via Jupyter web-terminal
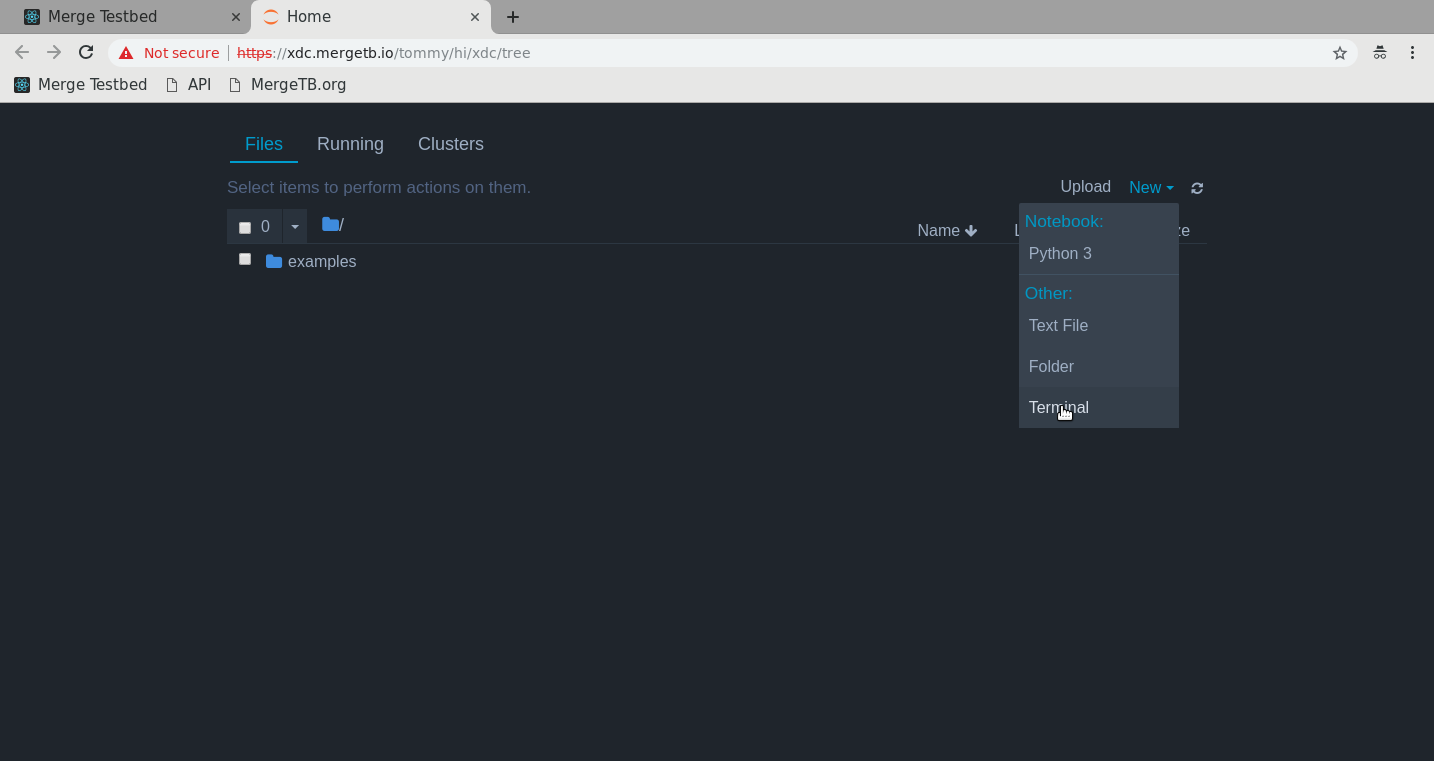
To connect via the web-terminal, click the Jupyter Notebook link for the XDC you wish to connect to. This will spawn the Jupyter Notebook interface to the XDC. From that, click New and choose Terminal.
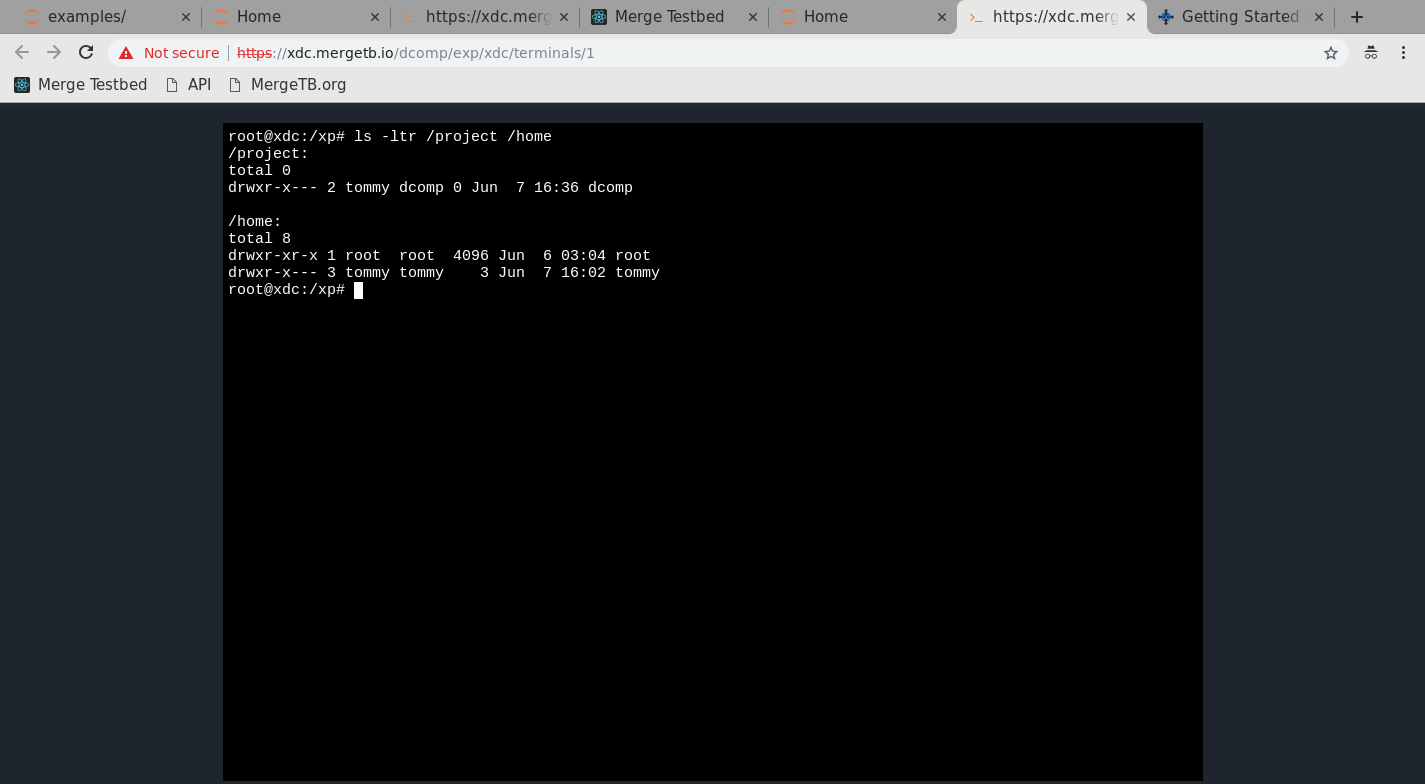
This will open a web-based terminal session in your XDC. It logs you in as root, but you can su - [user] to login as yourself. Note the project and user persistent directories in the screen shot below.
In the next screenshot, you can see the persistent project (/project) and user (/home) directories:
Connect to the XDC via SSH
Note: In order to SSH to the XDC, you must upload your public keys to the Merge Portal, if you have not already done so. See Add Your Public Key for instructions.
To connect to the XDC via SSH, we need to first ssh to a Merge
jumpstation node, and then to the XDC. We can do this with one command:
The jumpstation node is at jumpc.mergetb.io and listens for SSH
connections on port 2202. (For more information about jumpstations, see
-J destination in man ssh or ProxyJump in man ssh_config.)
As shown above, we connect to the XDC using the "XDC reference name",
which is of the form [xdc name]-[experiment name]-[project name].
You can find the XDC reference name for your XDC by looking in the
Reference Name column of the XDC widget in the experiment view of the
Merge Portal.
For example, the XDC reference name for the XDC we have been using in
our walkthrough is myfirstxdc-myfirstexp-maisie.
Tips for using ssh:
The first time that you connect to an XDC via
ssh, you may want to copy the private key (that pairs to the public key you uploaded to the Merge Portal via the GUI to the XDC. This will allow SSH connections from all XDCs to your experiment nodes to work without any more configuration.The Merge system places the public keys that are uploaded to the Merge Portal unto your experiment nodes as they are materialized. Thus if the private key is on an XDC (usually at
~/.ssh/id_rsa), SSH connections between the two will just work. Your home directory on XDCs is mounted when the XDC is spawned, thus it exists independent of the lifetime of any one XDC.Alternatively, instead of copying your private key to your home directory on Merge, you can use agent-forwarding (
-A):$ ssh-add ~/.ssh/<id_rsa>$ ssh -A -J jumpc.mergetb.io:2202 <xdc name>-<experiment name>-<project name>Some additional tips for using
sshwith your XDCs are here. Please take a moment to read through this.
Attach to the experiment materialization
Once connected to an XDC, you can access your experiment nodes by attaching the XDC to the materialization with the following commands:
You use the xdc utility tool (full path: /usr/local/bin/xdc) to
authenticate to the Merge Portal as well as manage attachments to
experiment materializations.
You first authenticate to the Merge Portal with xdc login <username>
using the same username and password used on the Merge Portal website.
Once logged in, you will remain logged in until you log out.
Then, you attach to your experiment materialization with
xdc attach <project name> <experiment name> <realization name>.
Attaching to an experiment materialization creates a secure tunnel between the XDC and your experiment gateway and sets up DNS to resolve the names of your experiment nodes.
You can confirm the connectivity to all of your experiment nodes by
running xdc ansible ping. This will use Ansible to ping each node in
your experiment and report the results.
(The xdc command can also generate Ansible inventory and
/etc/hosts-style files for your attached experiment. See xdc -h for
usage.)
Once you have attached to an experiment materialization, you are now ready to use your experiment nodes via SSH.
Project and User Directories are Persistent
Project- and user-directories are persistent and mounted on each XDC (but are not mounted on experiment nodes).
A per-project persistent directory is created for each project and
mounted at /project/<project name>.
Per-user persistent storage is mounted as your home directory under
/home/<username>.
The lifetime of these project and user directories are independent of the XDC's lifetime.
Example Session
Let's walk through an example session of attaching to the experiment materialization in an XDC.
In this session, the username is glawler, the project is glawler,
the experiment is hi, and the realization is one. Our experiment
nodes are n[00-05].
We also confirm the connectivity vis Ansible, xdc ansible ping:
Use the experiment nodes via SSH
After you have attached to the experiment realization in our XDC, you are now ready to use the experiment nodes in the topology that you defined earlier.
In our previous example, the experiment nodes are named n[00-05].
You can ssh into any of these experiment nodes from the XDC. For
example:
You can also use ansible to
configure and orchestrate your experiment nodes.
Detatch from the experiment
When you're finished working with your experiment nodes you may (optionally) detach from the experiment nodes and (optionally) destroy the XDC.
To detach from the experiment nodes, run the xdc detach command from
within your XDC.
We are now detached from the experiment nodes.
Delete the XDC
To delete the XDC, navigate to the experiment view in Launch (Your Testbed and click the experiment name) and click the x at the end of the row for your XDC in the Experiment Development Containers widget.
Deleting the XDC will not destroy per-project (/project) or
per-user (/home) storage.
Experiment Cleanup: Dematerializaiton and Deletion
There are two steps to cleaning up an experiment and freeing the resources used:
- Dematerialize
- Delete
Dematerialize the Realization
To dematerialize the realization, push the Dematerialize button.
Note that this will not free the resources of the realization. Those testbed resources are still reserved for you. To free the resources, you must delete your realization.
Delete the Realization
To delete the realization (after you've dematerialized), navigate back the experiment view, and click the x next to the realization you wish to delete. Once done, the testbed resources are freed for other to use. You may of course, re-realize to re-reserve.

Note that you can also delete a realization by deleting the experiment that the realization exists in. In general when you delete an entity, resources under that entity are deleted. If you delete a realization, materializations of that realization are deleted. If you delete an experiment, its realizations (and thus any materializations) are deleted. Etc.
Managing Project Membership
Adding Members to a Project
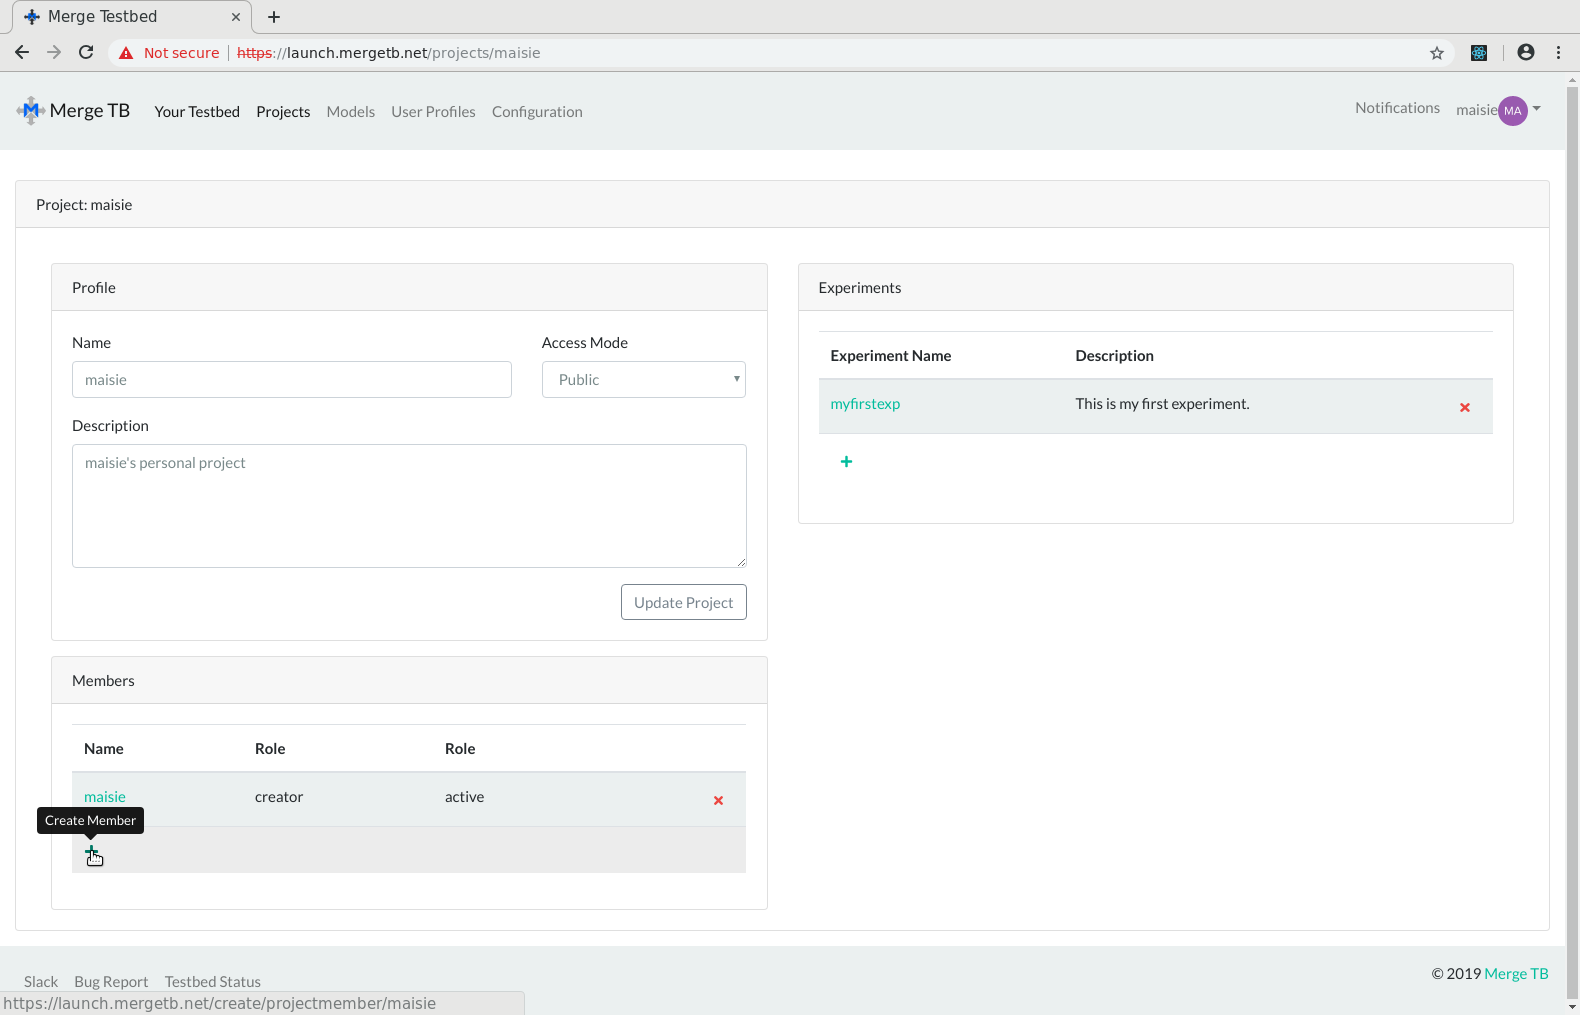
To add a member to your project, navigate to the project view of the project and click the + in the project members list.
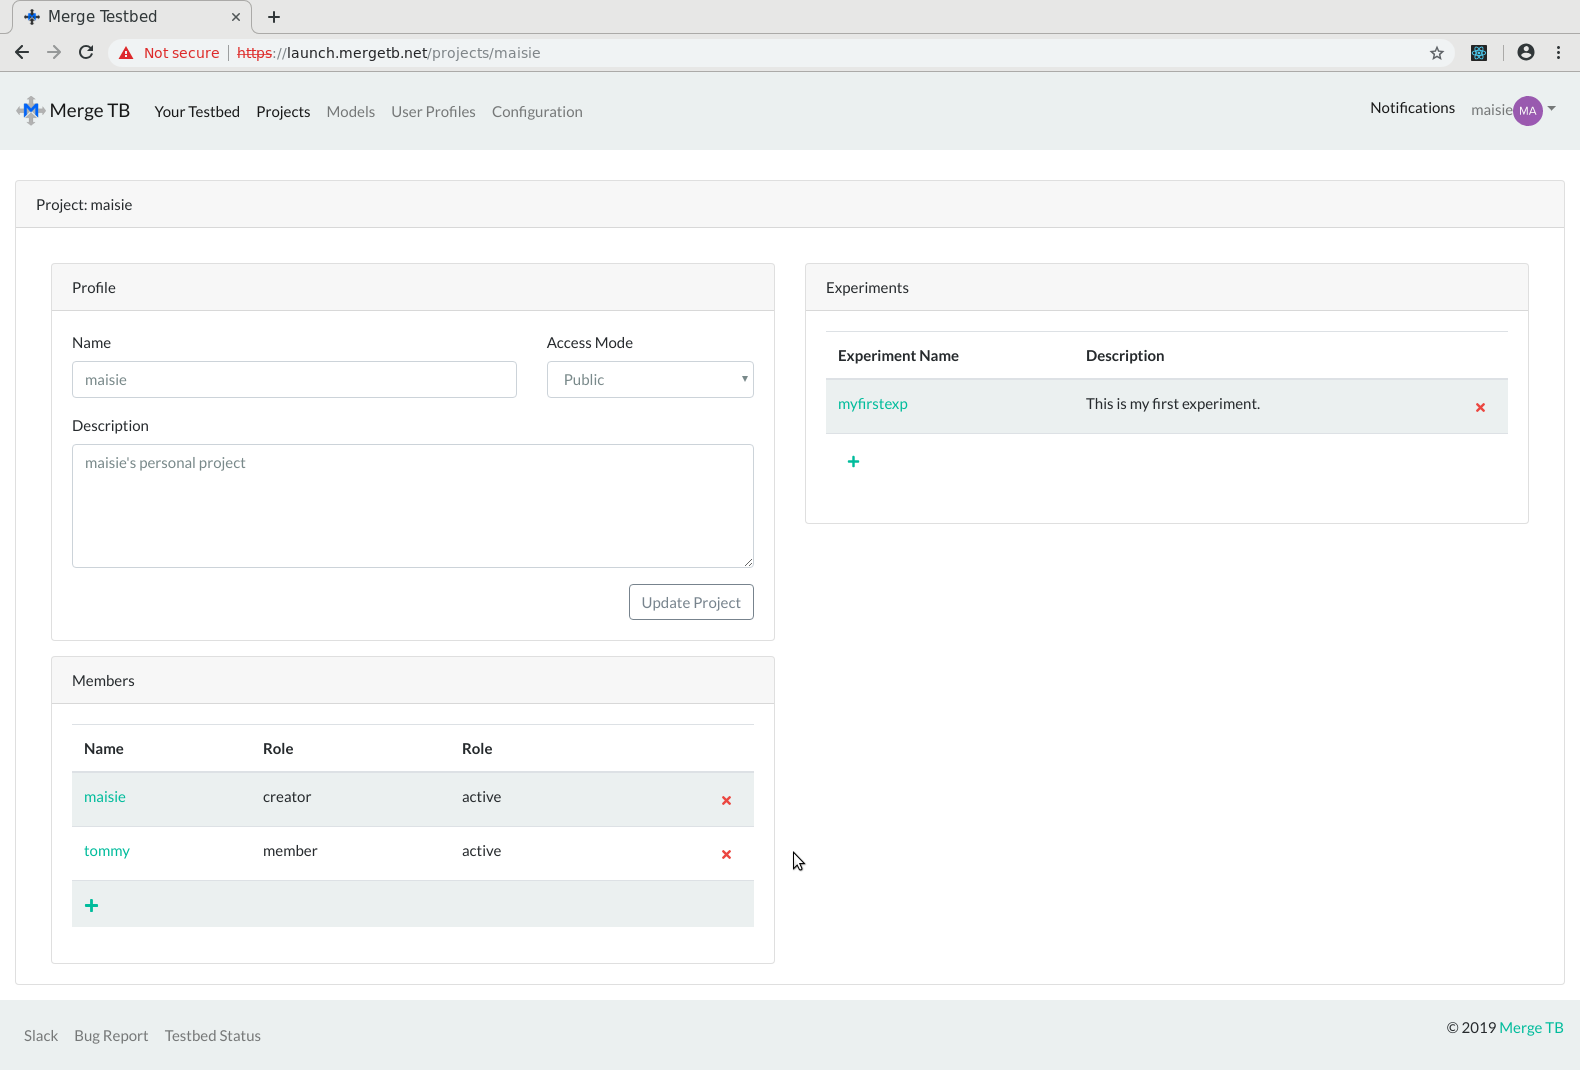
Note the username must match an existing user. Once the user is added to the project, they will have access to everything in that project. Their username will be added to the project's group and thus they will also have access to the shared project folders.
To remove a project member, click the x at the end of the member's row in the list.
Added members will have read and write access to the project and they will be assigned a member role. Note that only the creator of a project can delete the project.
Deleting Members of a Project
TODO